Syringe Pump Guide
Building Syringe Pumps:
Once you have all the parts, building it is pretty intuitive. See full instructions at http://hackaday.io/project/1838-Open-Syringe-Pump.
Even if you’re inexperienced at soldering, this is a great project to learn on! Solder the Arduino shield kits first as practice, then solder the wires onto the Big Easy Driver.
Probably the only difficult part of the assembly is to cut the threaded rod and smooth rod to the appropriate length. You can either do that yourself with a chop saw by clamping the rod into the groove of the 80/20 rail. Or you can bring it to a machine shop and have it cut there (should be quite cheap).
Programming
To change the firmware of the syringe pump, connect it to your computer using a USB cable.
You will need the Arduino IDE : http://www.arduino.cc/en/Main/Software
The code is available from here: https://github.com/naroom/OpenSyringePump (see “Download As Zip” on the right side.)
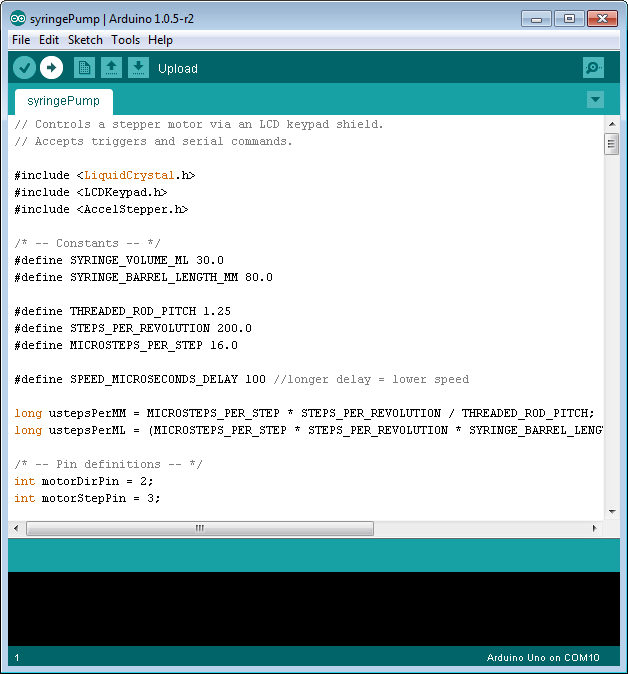
First, open the SyringePump.ino file:
Click “Upload” to compile and run the code on the syringe pump. Note that you may want to change the numbers pertaining to your specific syringe (SYRINGE_VOLUME_ML and SYRINGE_BARREL_LENGTH_MM).
You can also customize the code to change the speed, default bolus size, add more menu options, add more commands – anything you like!
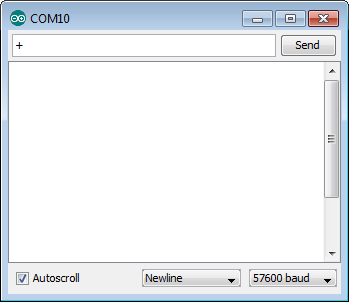
You can send commands to the serial port directly from the Arduino IDE. Use Tools -> Serial Monitor:
Change the baudrate to 57600 and set the line terminator to “Newline” as pictured. Then try sending a “+” as shown. If the syringe pump is powered, it will send a bolus. Sending “-“ will reverse the pump by 1 bolus. You can also specify the bolus size in microliters by sending it, e.g. ‘300’ will set it to 300 microliter bolus.
Driver Chip Documentation
This is a nice writeup about using the Big Easy Driver: http://bildr.org/2012/11/big-easy-driver-arduino/
Note the power adjustment knob in the first diagram – if the motor’s overheating, turn it down. For more power, turn it up! Note that the knob is fragile. Use a large screwdriver and turn it very gently.
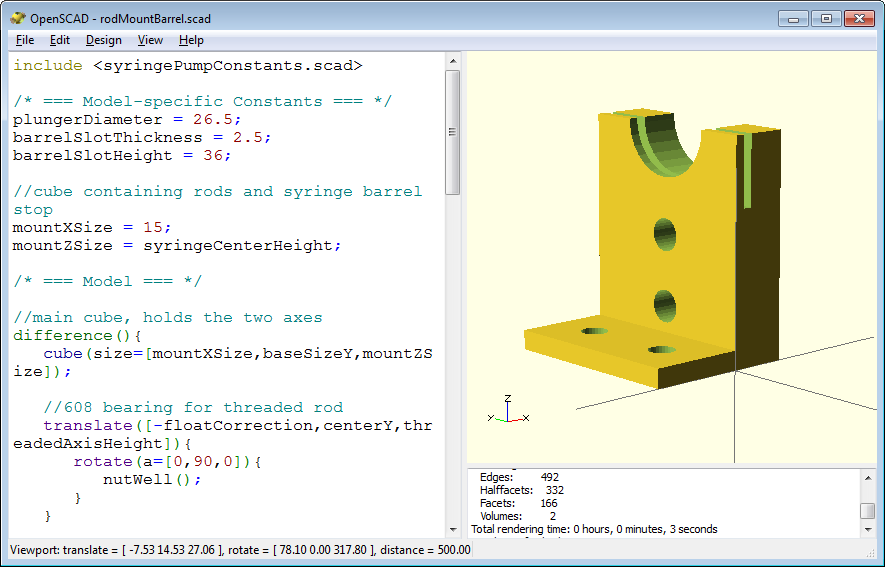
3D Printing
Want to customize the project to fit your syringe? No problem! The 3D print files included can be opened using the free program OpenSCAD: http://www.openscad.org/ Load a file and press F6 to render it. Change parameters as you see fit!
OpenSCAD has fantastic documentation and is very fun to learn: http://www.openscad.org/documentation.html
When you are done making your model in OpenSCAD, use the “Export As STL” menu option to get a 3D printable file.
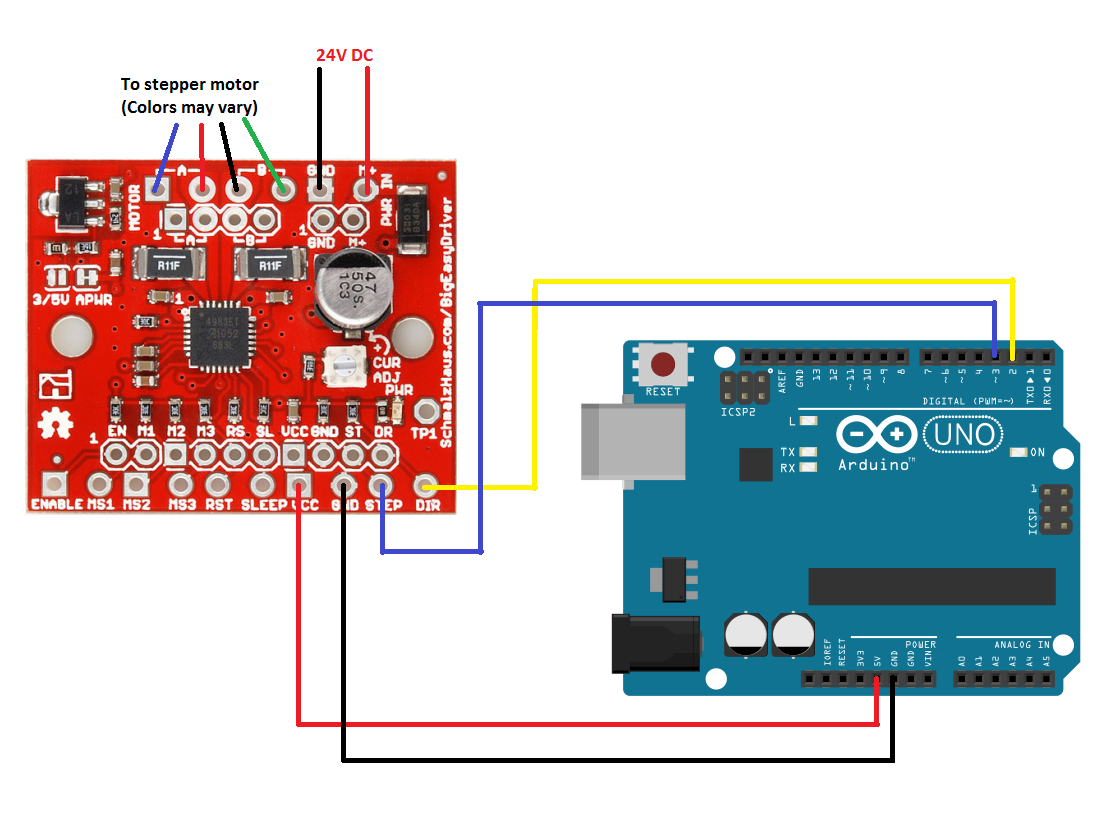
Wiring
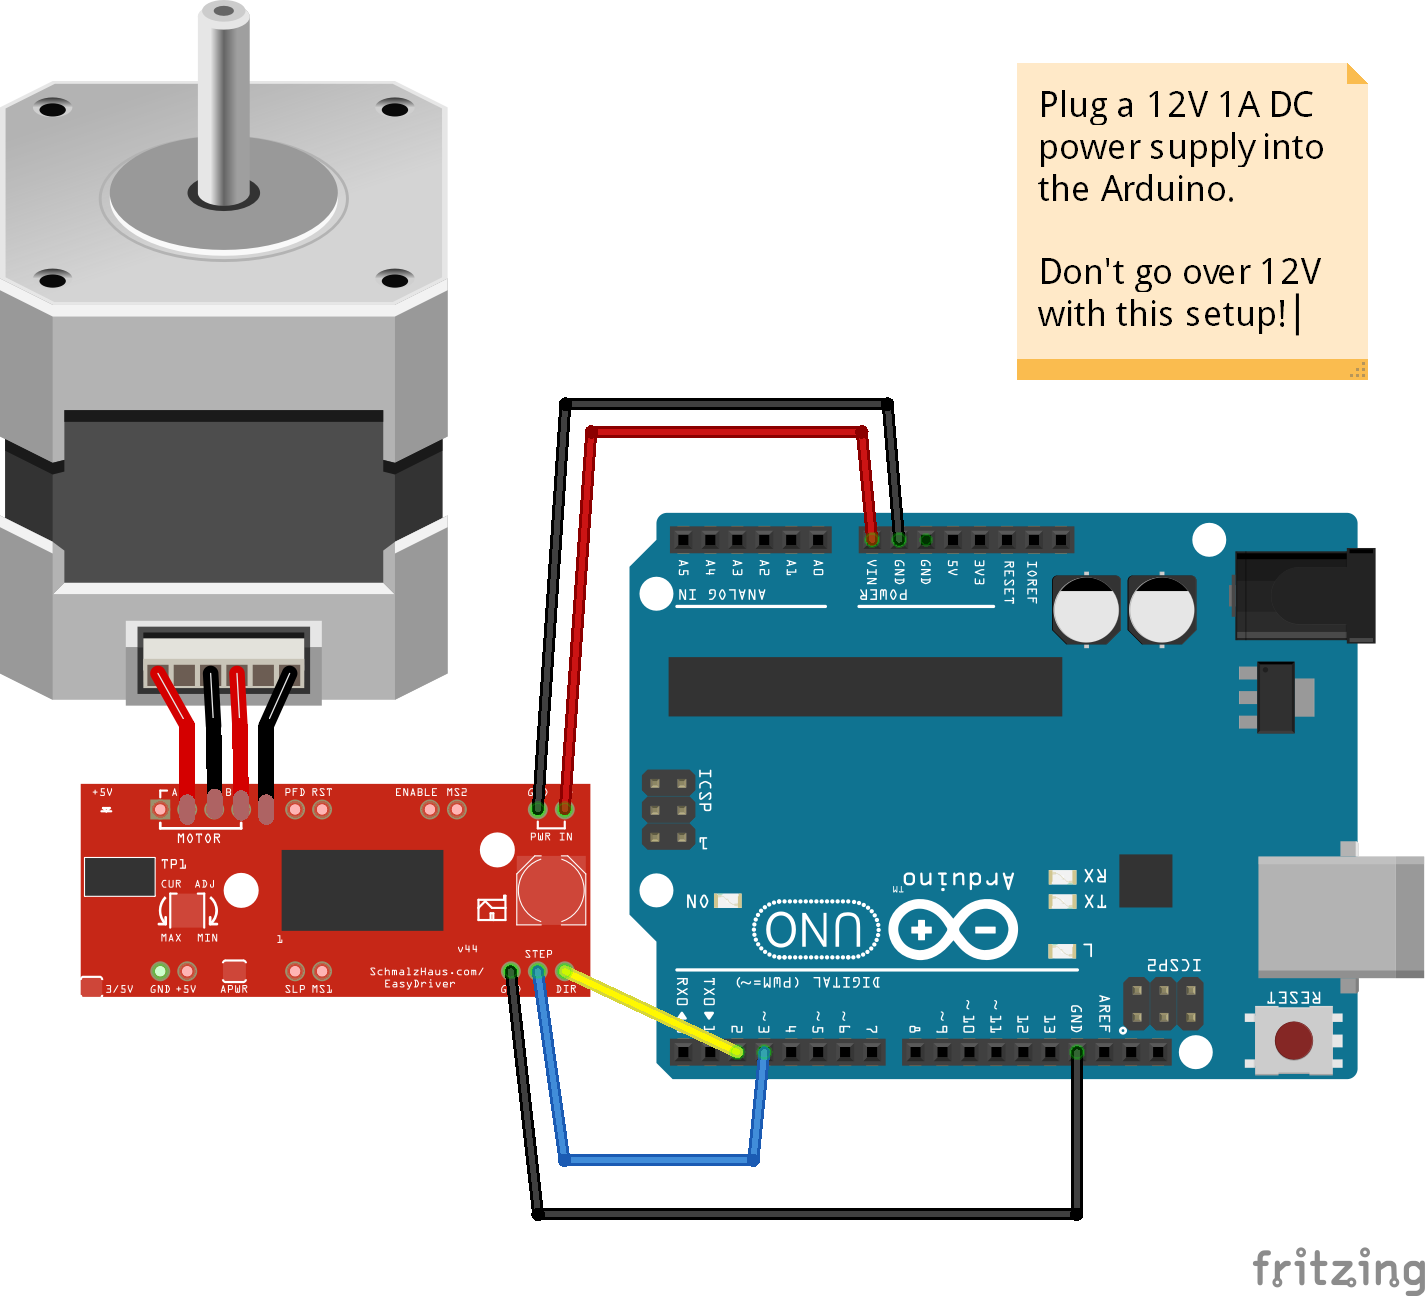
There are two ways to wire it, depending on which driver you go with. I prefer to use a 24V power supply in this fashion:
But you can also do it by plugging 12V directly into the Arduino. This shows the SparkFun EasyDriver, but you can also use the Big Easy Driver here: