mixed-reality
Installing PIX for HoloLens 2
PIX is a performance tuning and debugging tool for DirectX 12 applications on Windows but can also be used for DirectX 11 using Direct3D 11 on 12.
Prerequisites
- Latest version of PIX installed on the PC.
- Latest Windows SDK for IPoverUSB to be able to connect the HoloLens 2 to a PC via USB.
- An ARM64 build of your application. PIX only supports ARM64.
- The HoloLens2 needs to be connected to the PC via a USB cable.
[!NOTE] Some configurations, like using a Windows Insider build can break PIX on HoloLens 2. If that happens, reflash your device to erase all data and repeat the instructions below.
Setup
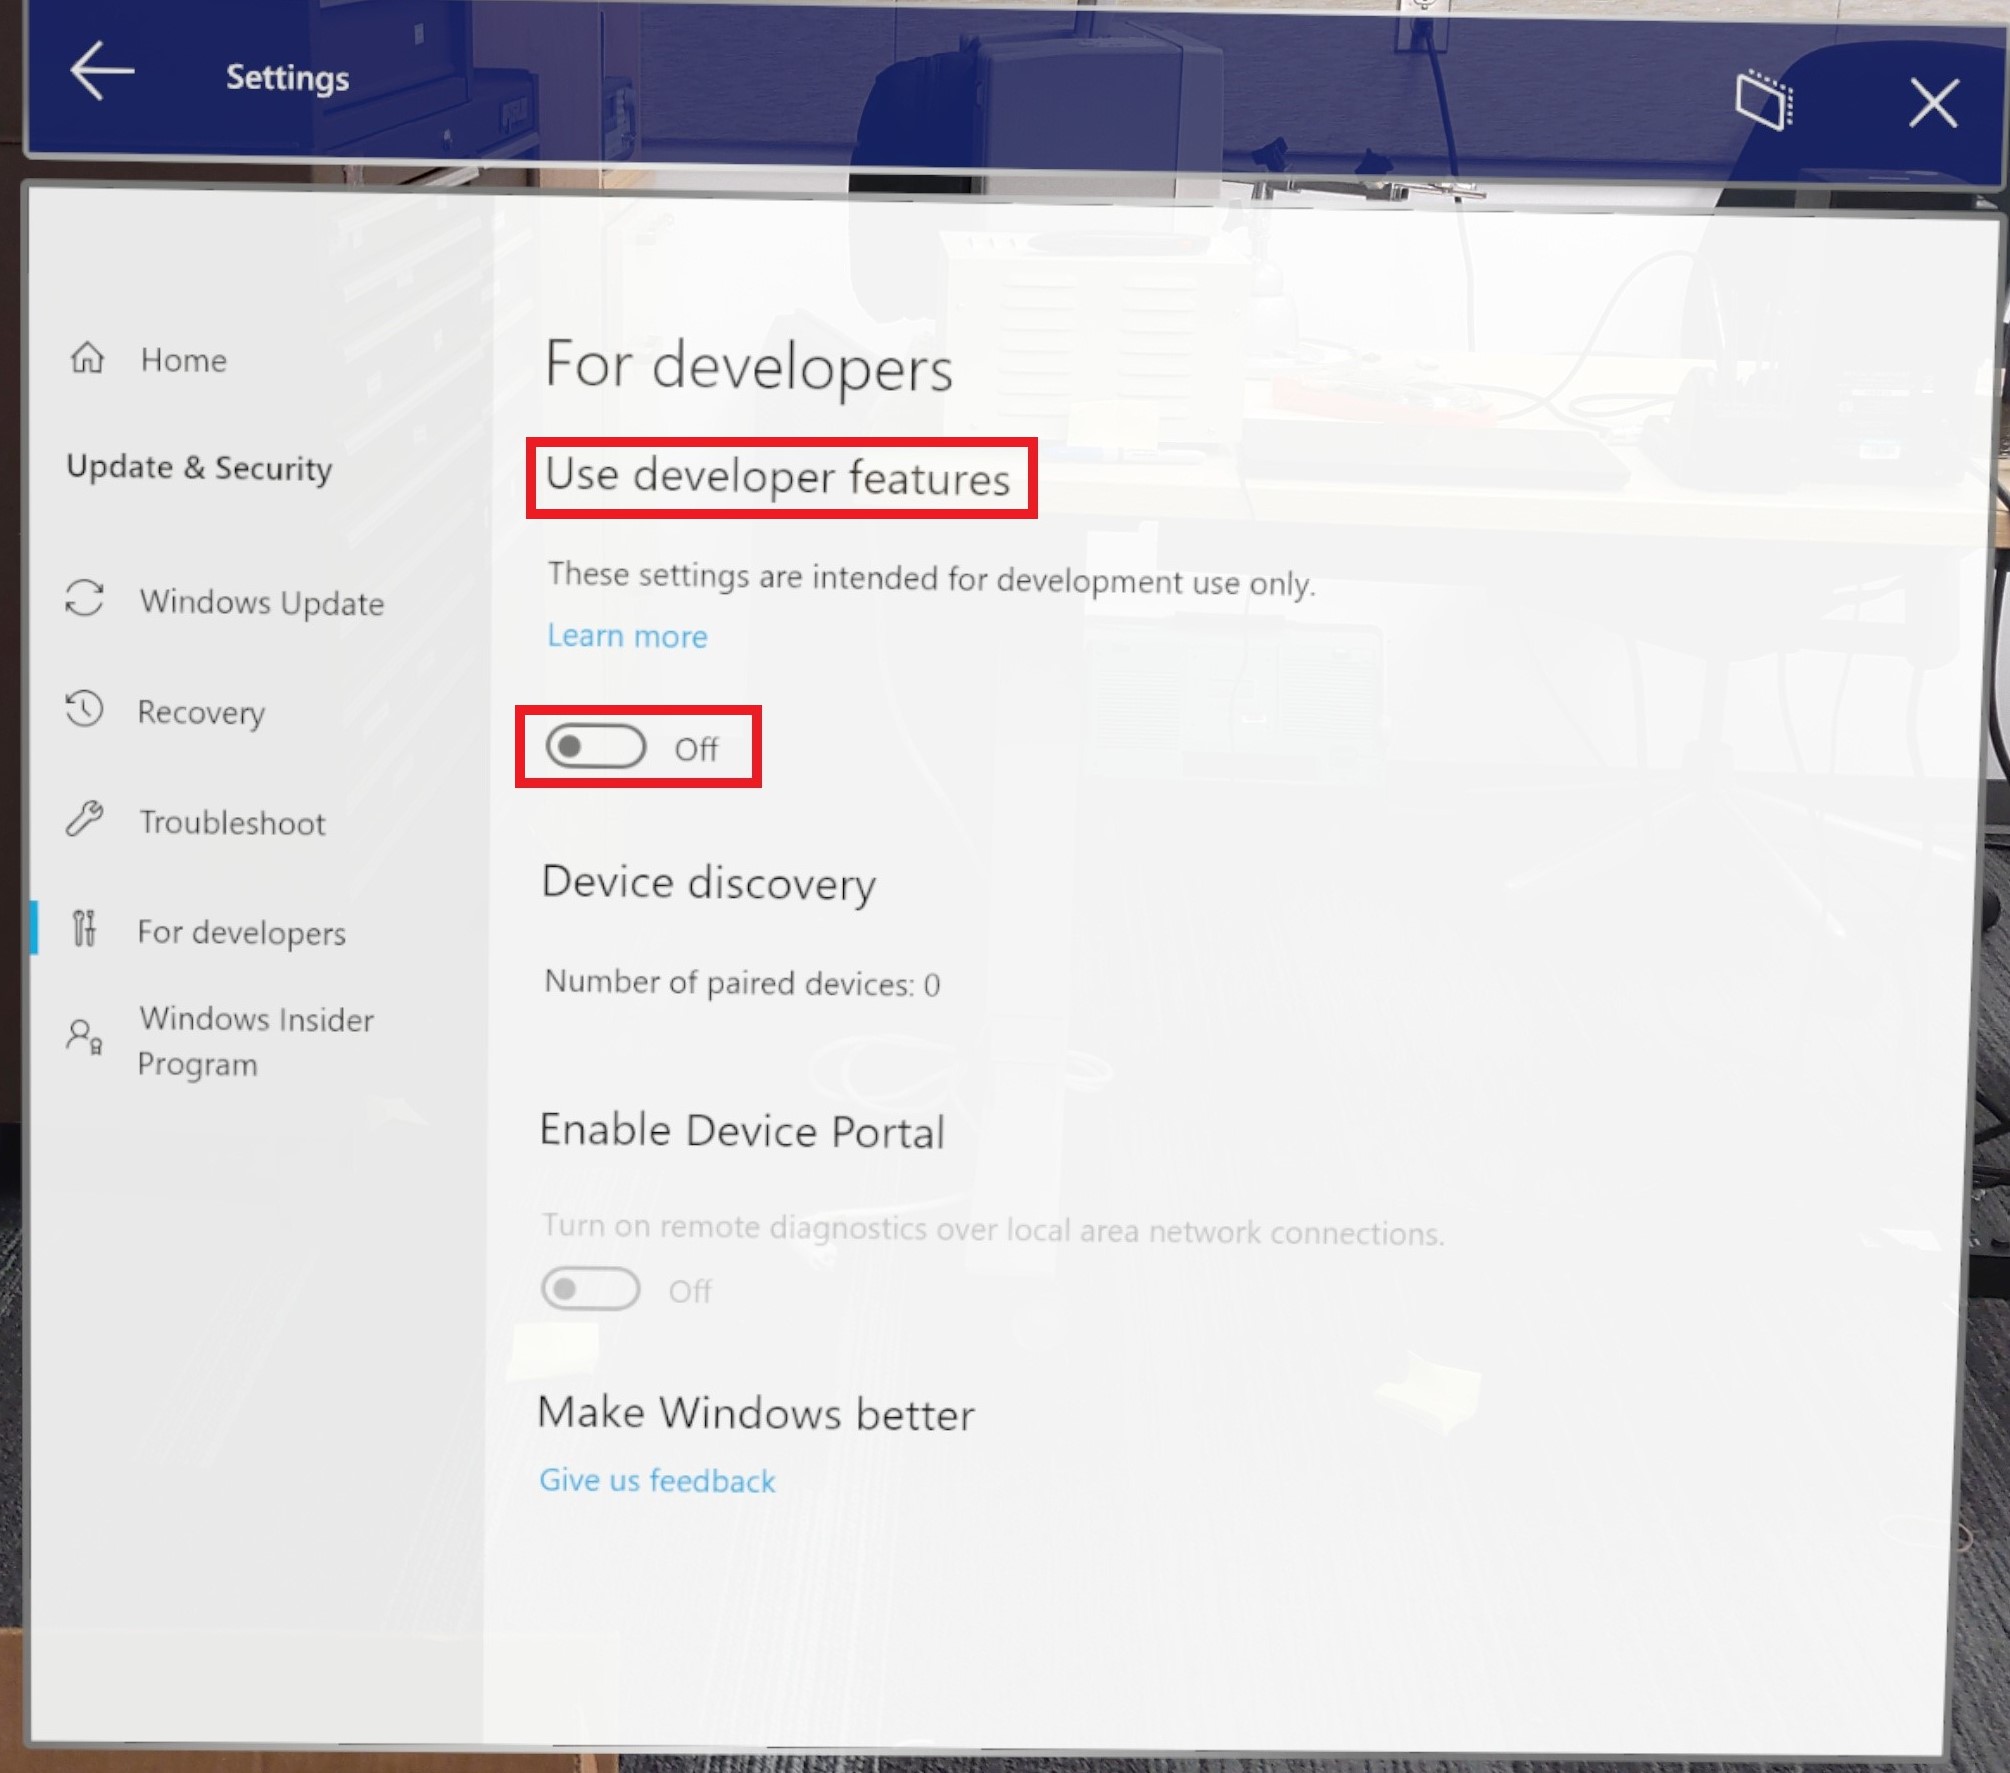
- Enable Developer Mode and Device Portal:
- Open Settings from Mixed Reality Home:
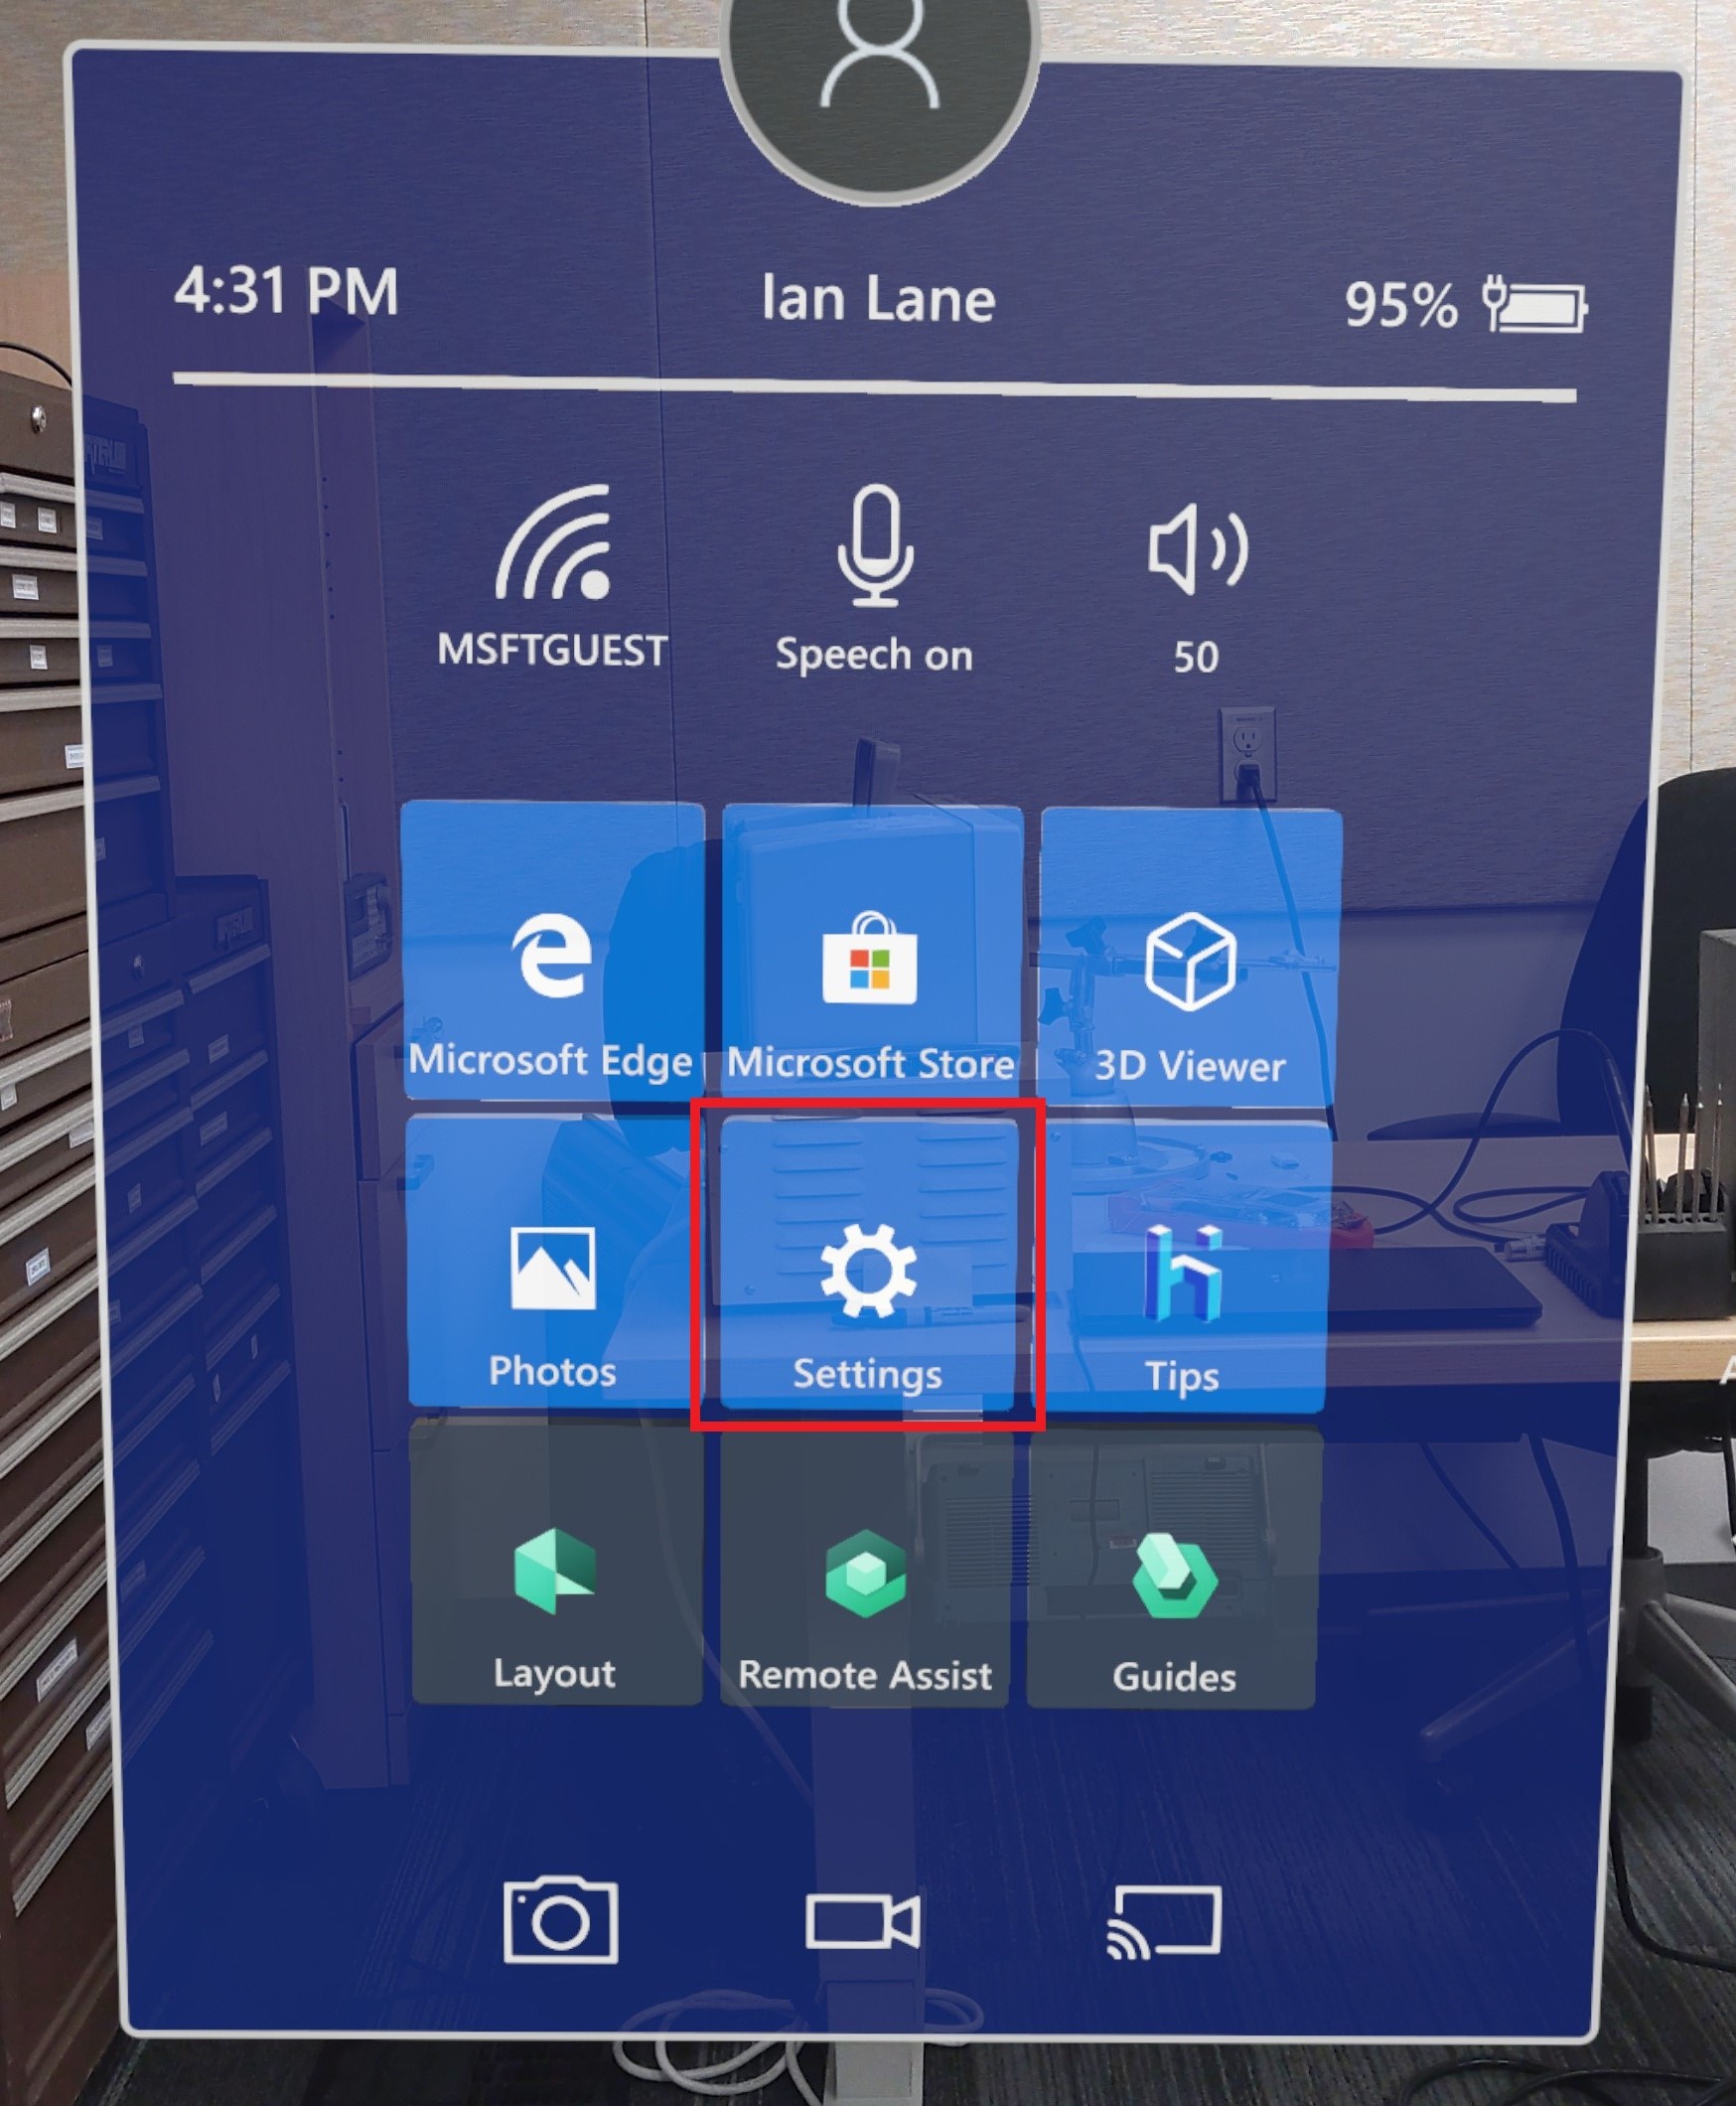
- Select Update & Security:
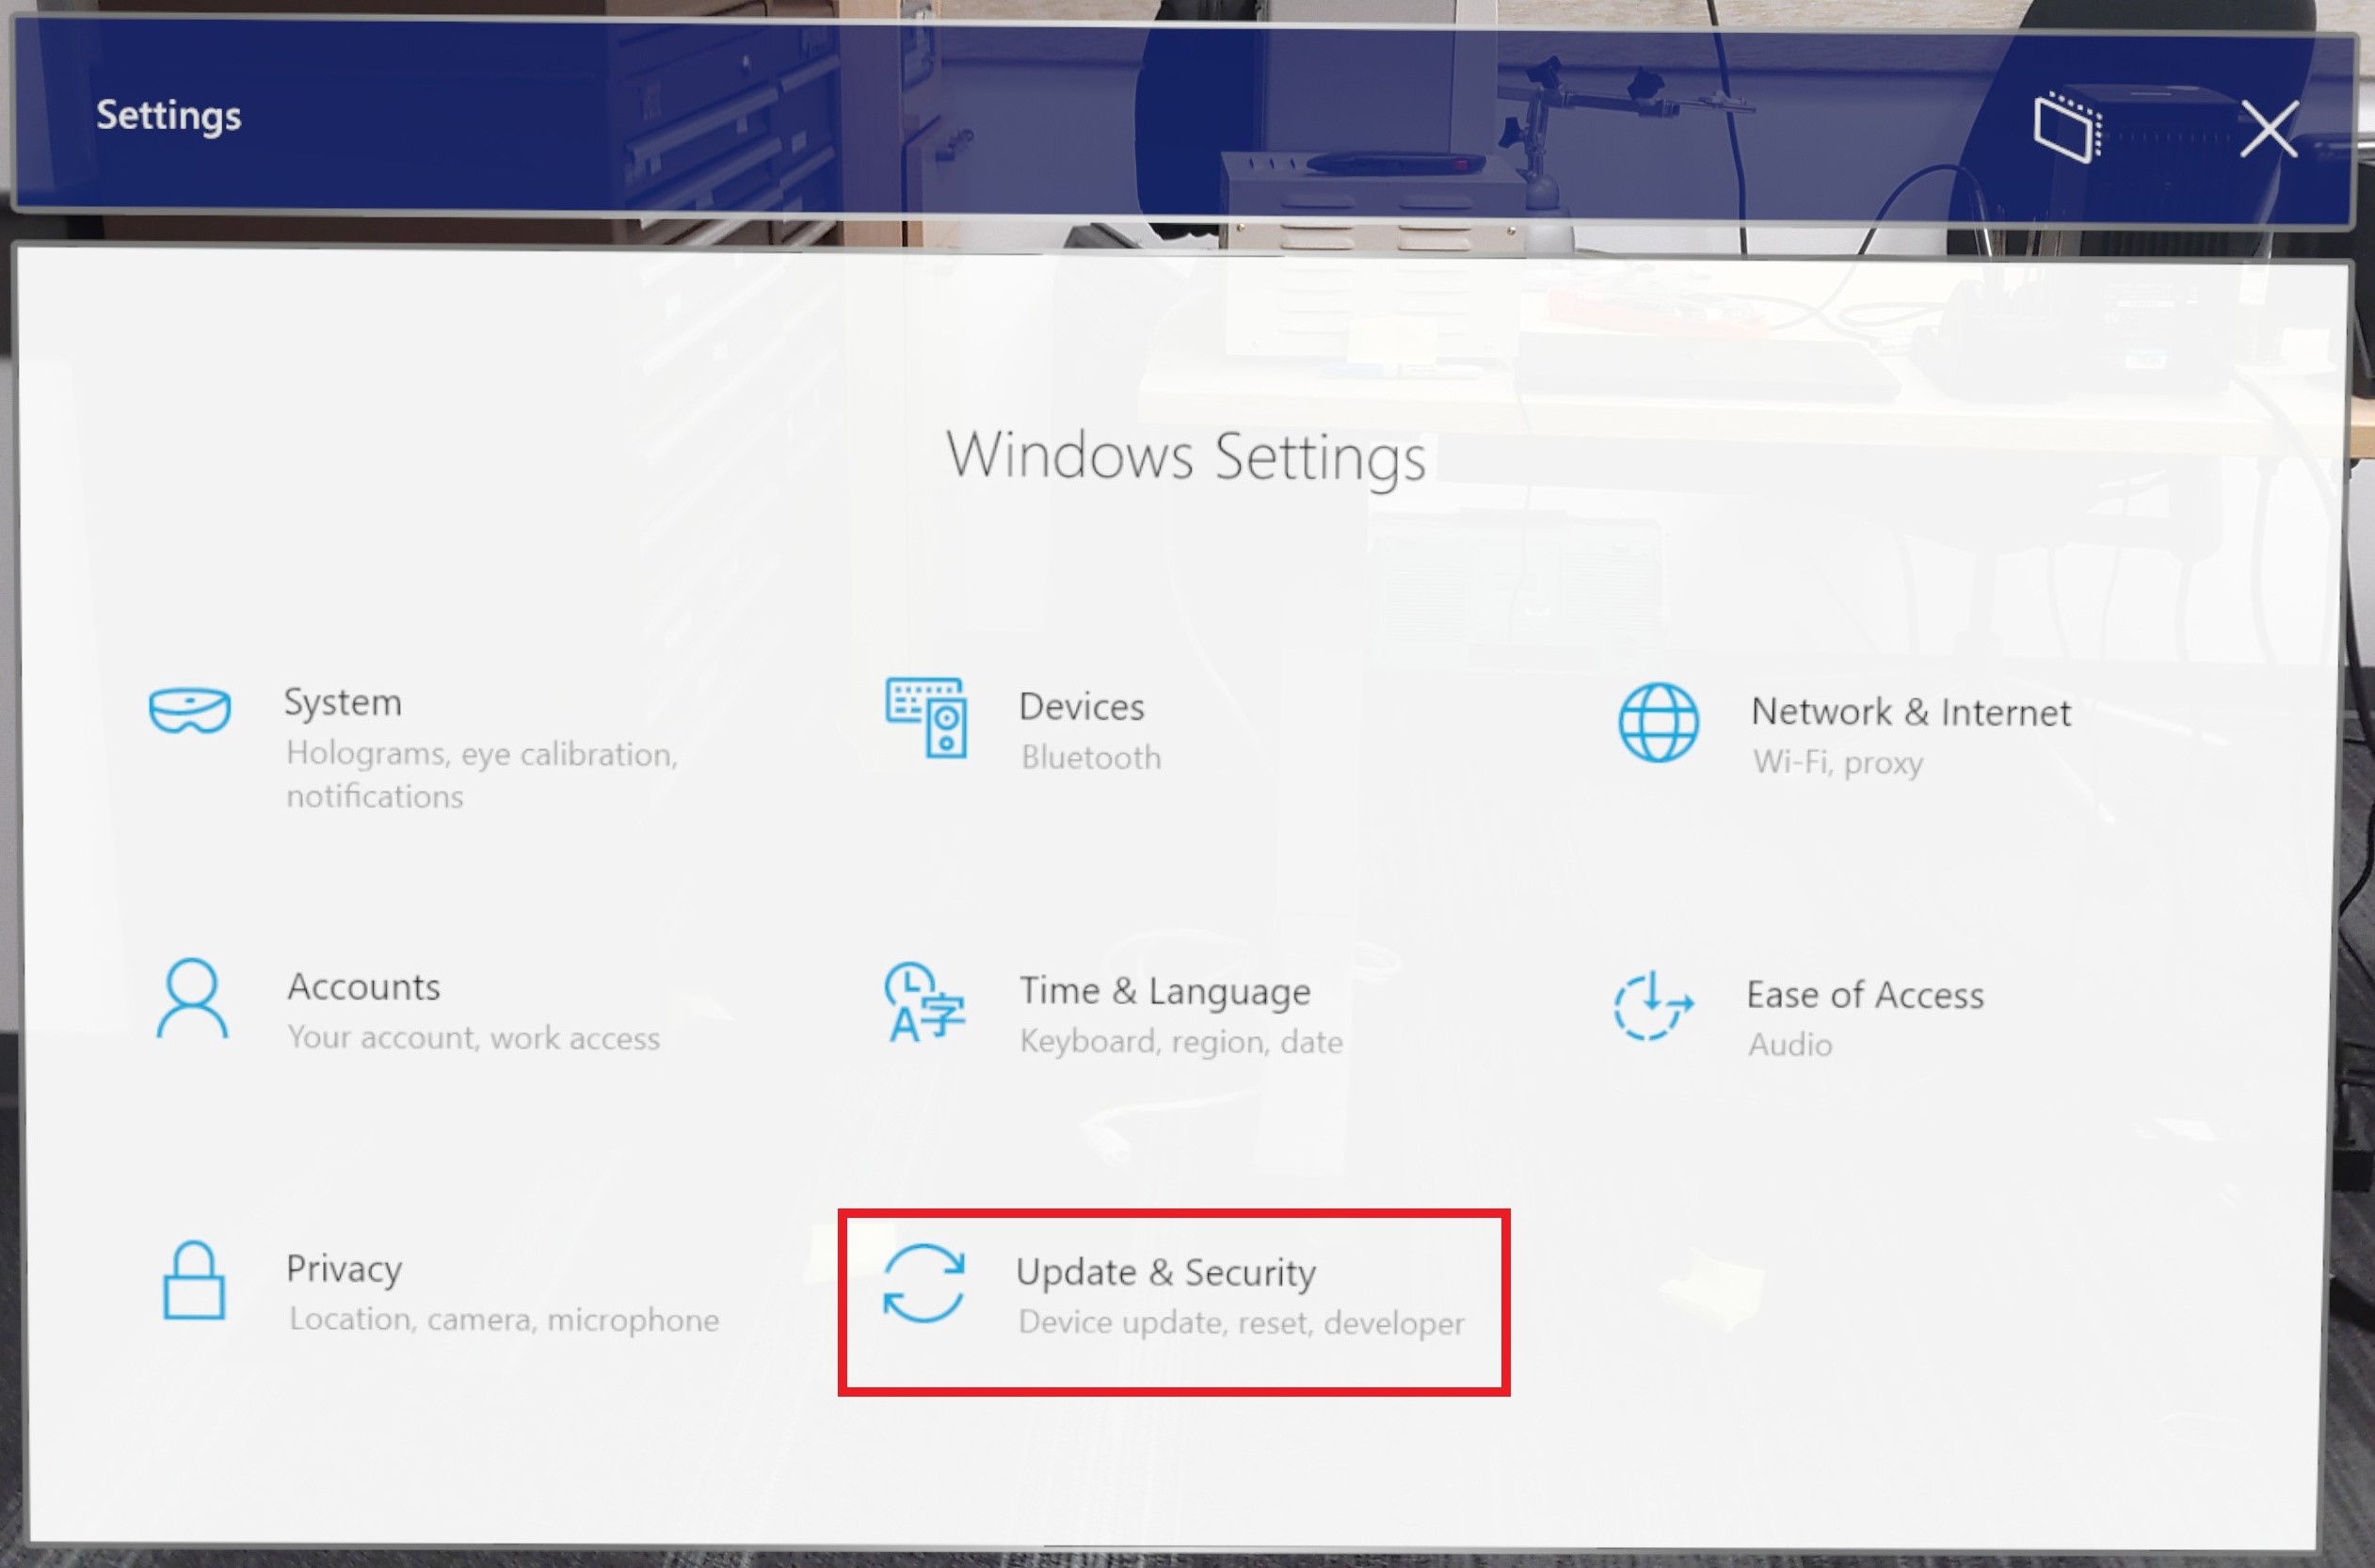
- Select For Developers:
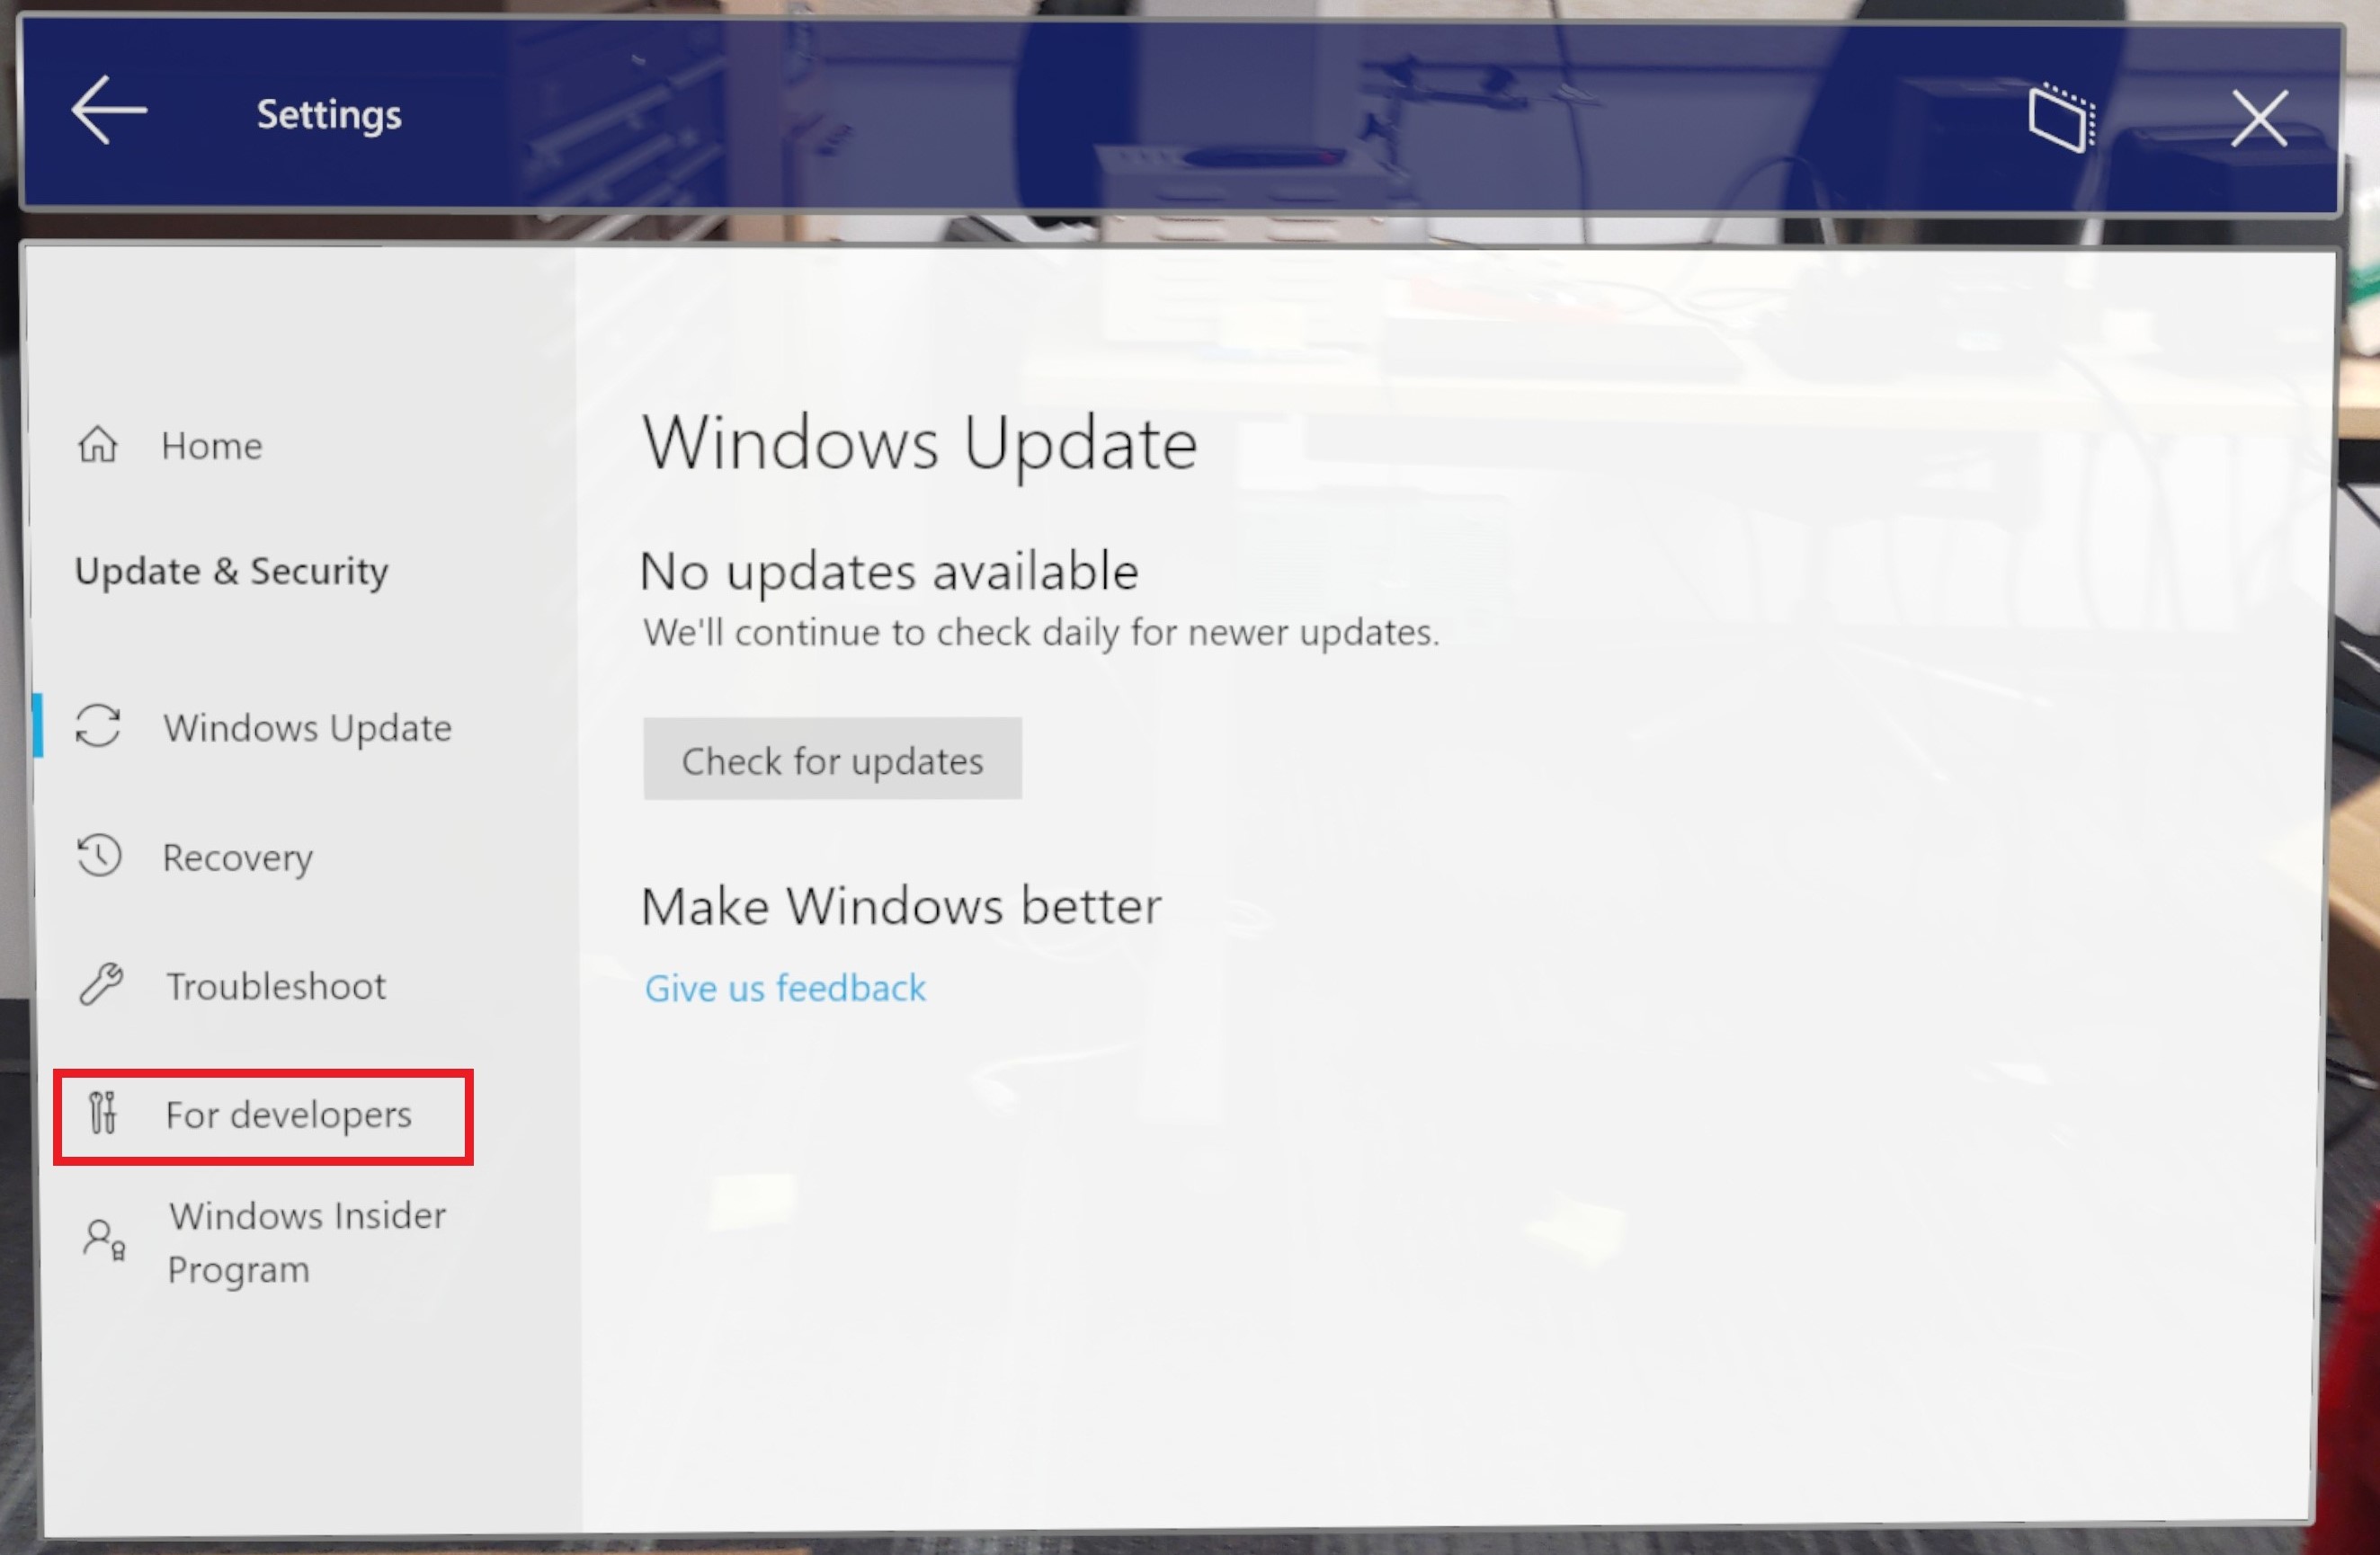
- Turn on Use Developer Features and Enable Device Portal
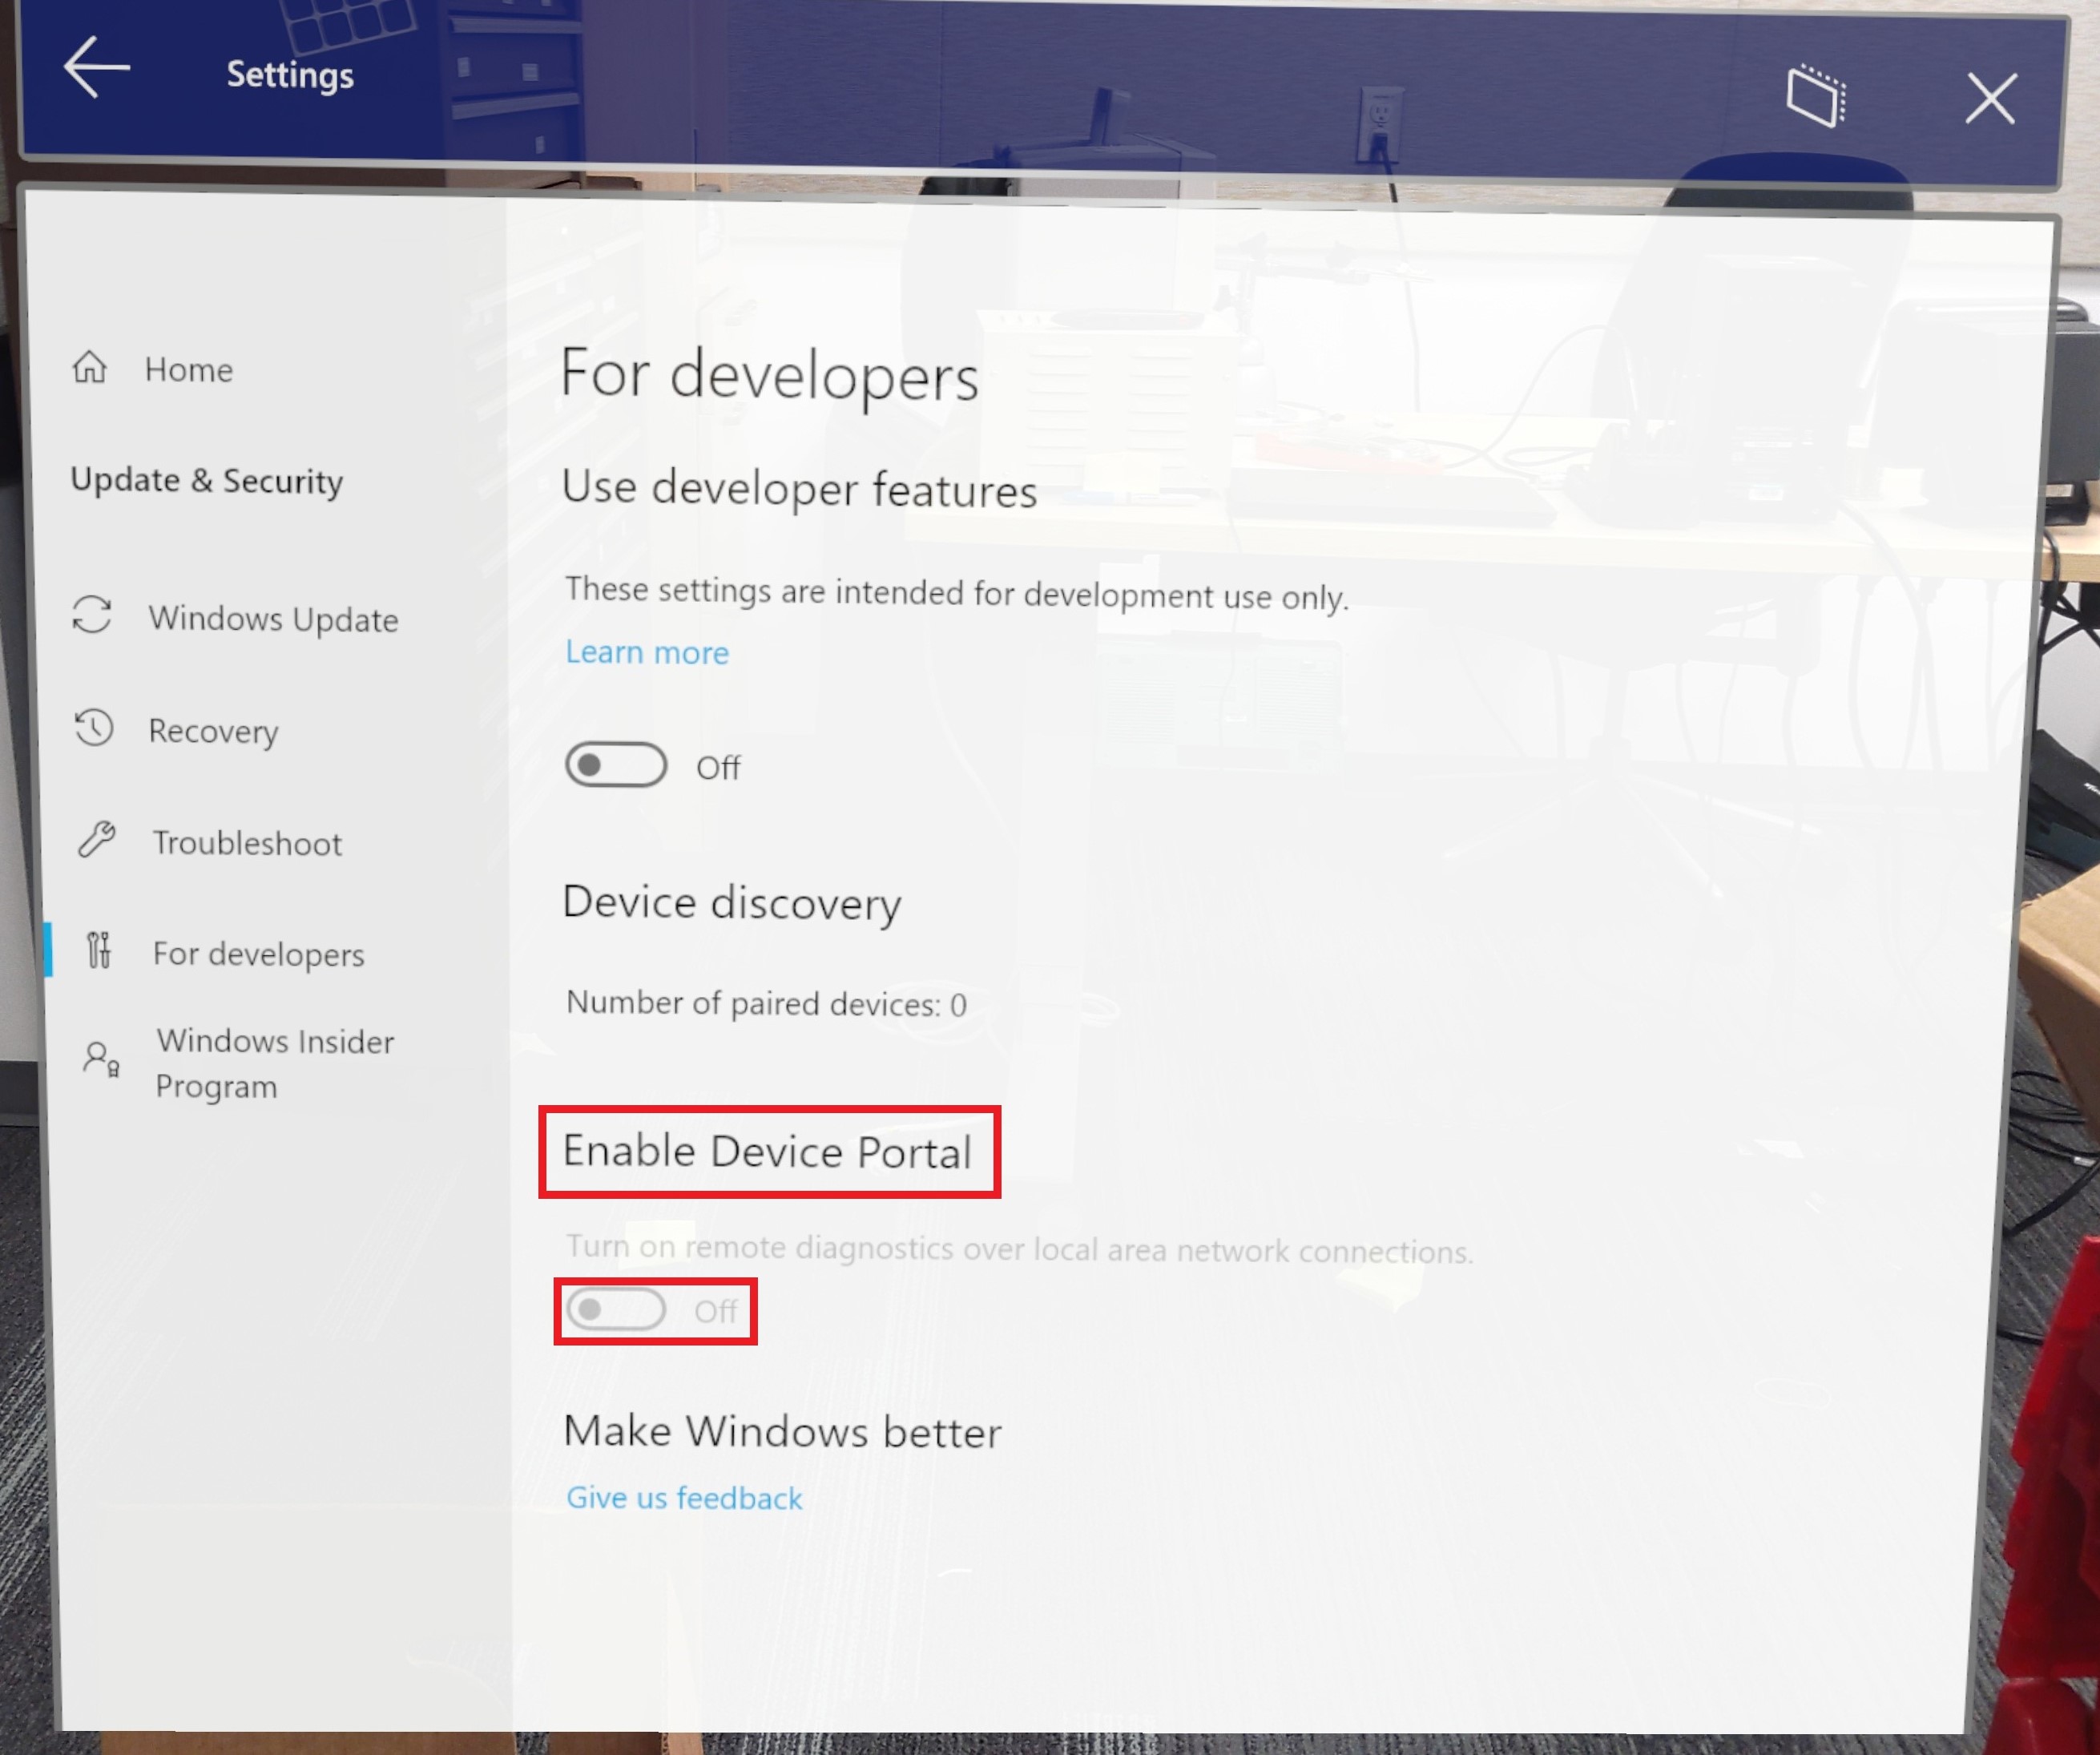
- With the device still connected, awake, and with the user logged in, launch Visual Studio.
[!IMPORTANT] Make sure your device isn’t in standby mode or asleep. If you’re having trouble with this step, refer to the Windows Device Portal instructions.
Preparing for deployment
- In Visual Studio, set ARM64 as the platform and Device as the device:

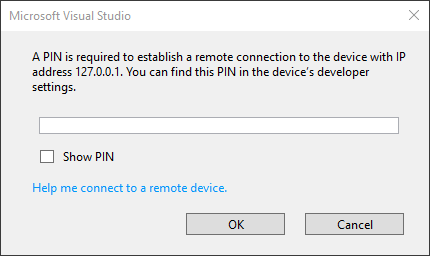
- When Visual Studio prompts you for a PIN from the device:
- Select Settings from Shell
- Select Update & Security
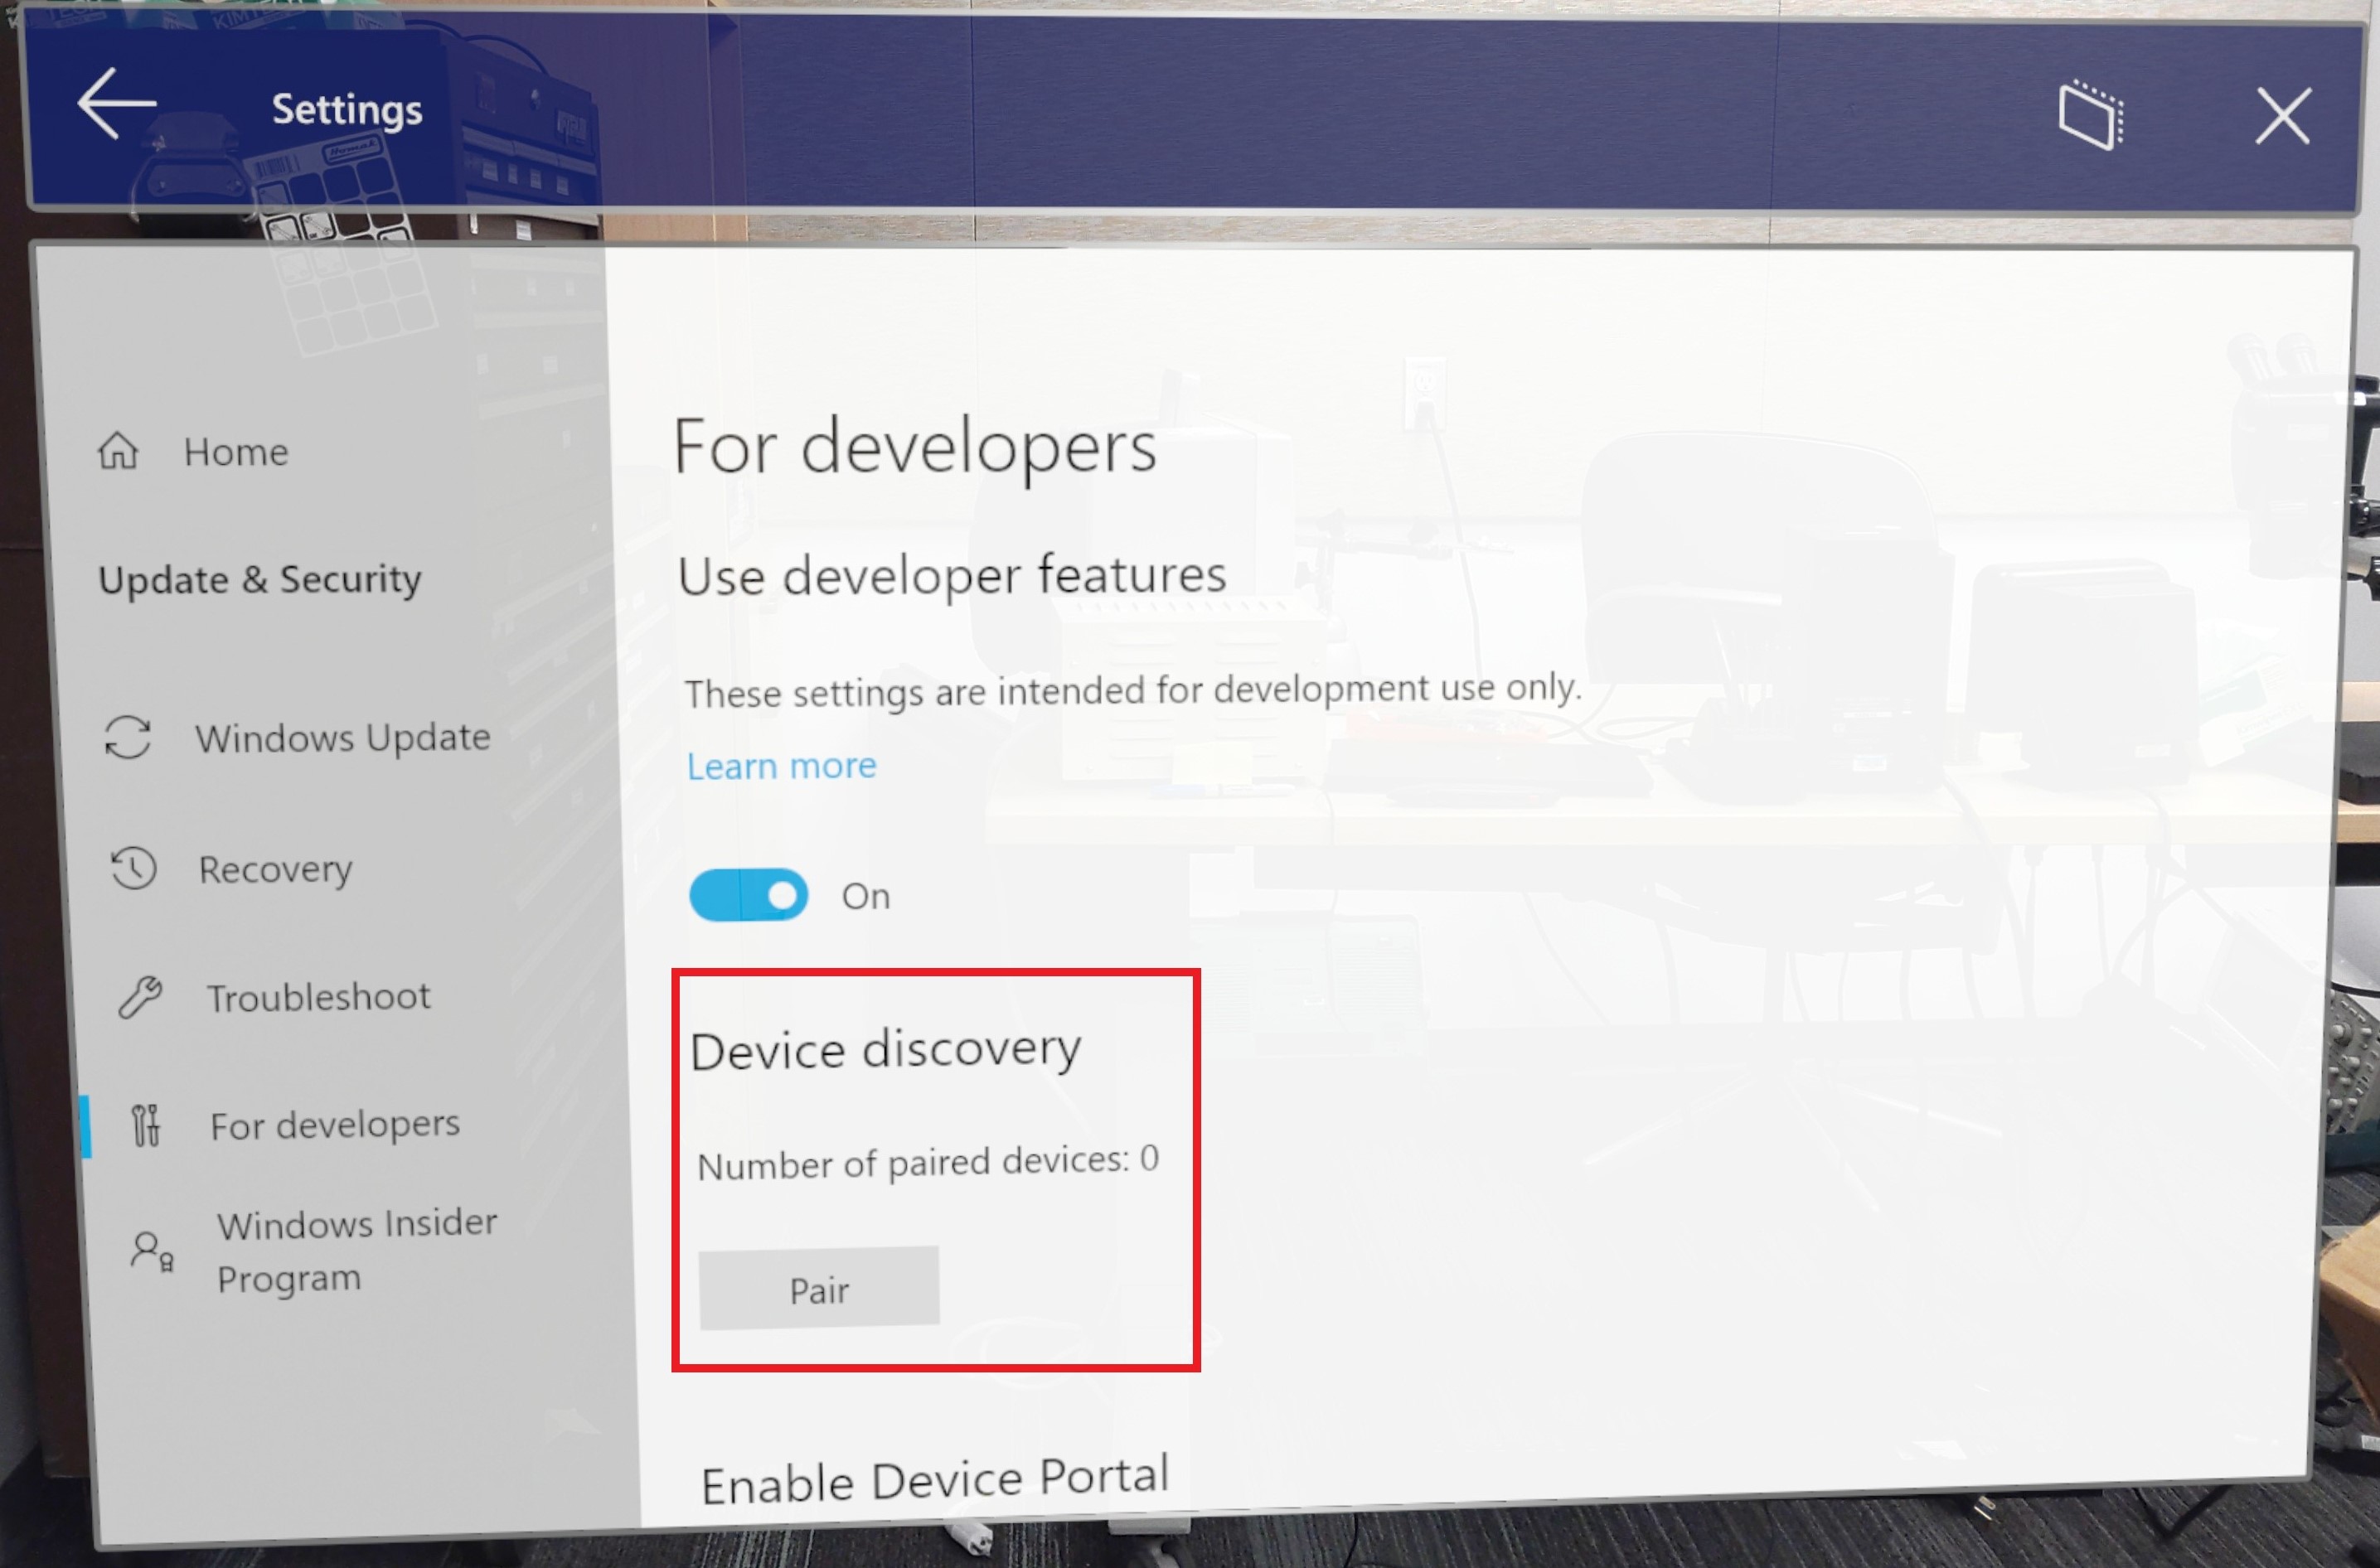
- Select For Developers and press Pair under Device Discovery
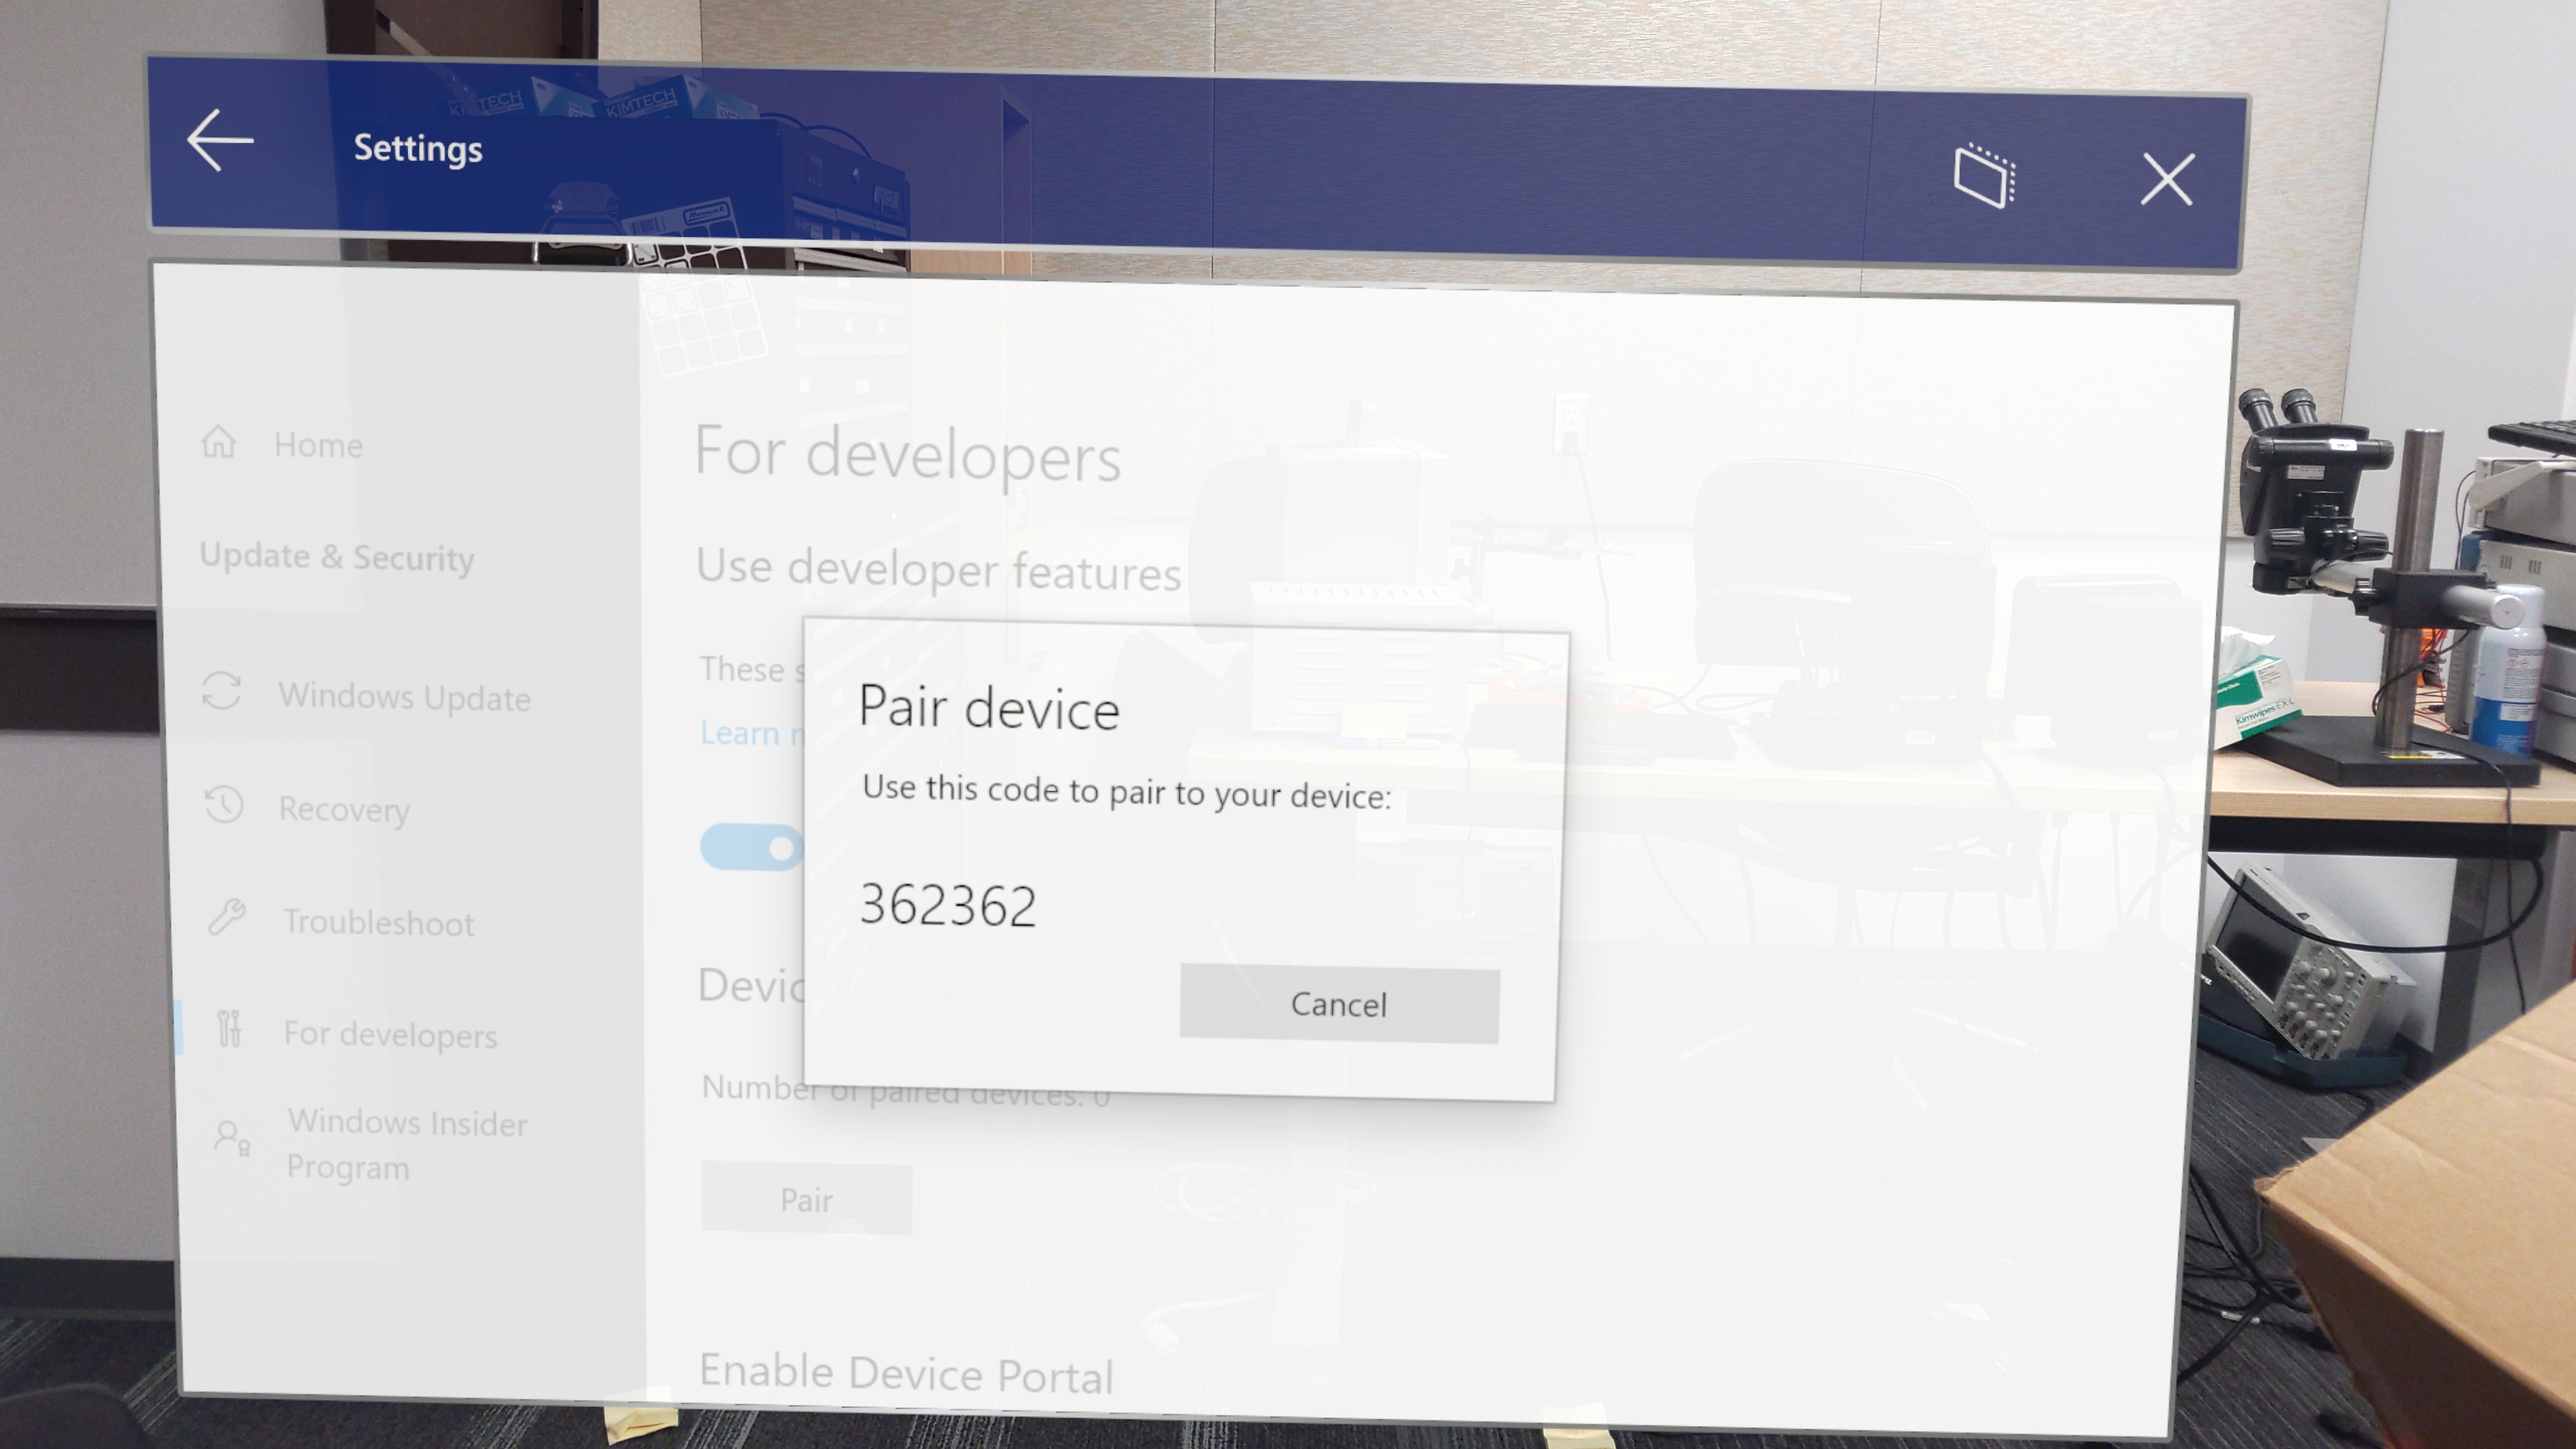
- Enter the generated PIN number in Visual Studio
- Visual Studio will deploy the app to the connected HoloLens 2, which may take a few minutes depending on the app.
Launching PIX
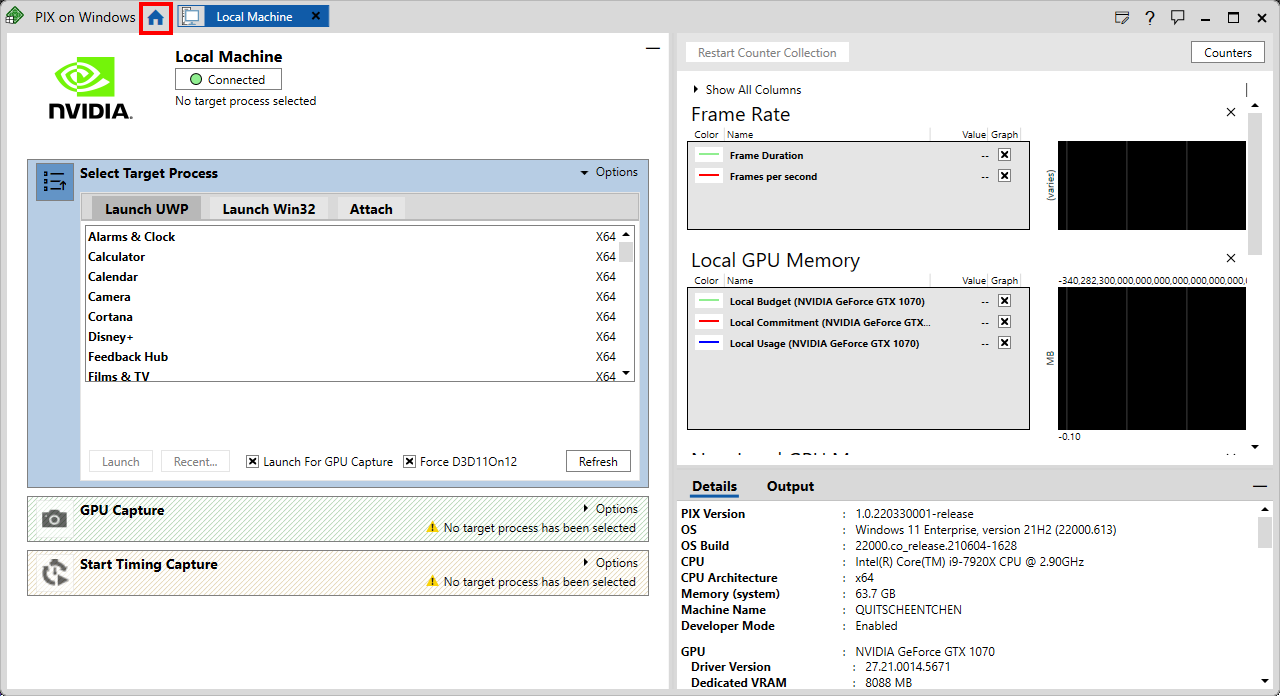
First, use Device Portal to verify the app isn’t running on the HoloLens 2. Then, launch PIX, connect to your device, and select Home:
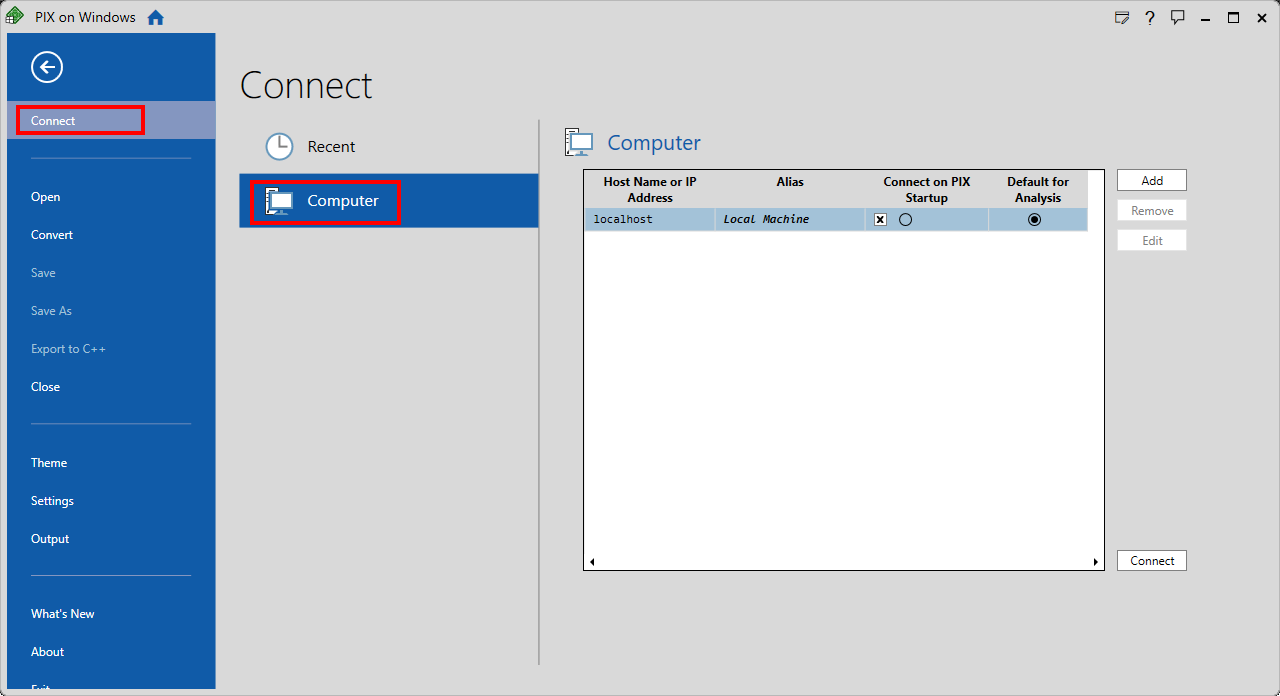
- Select Connect from the left-side menu:
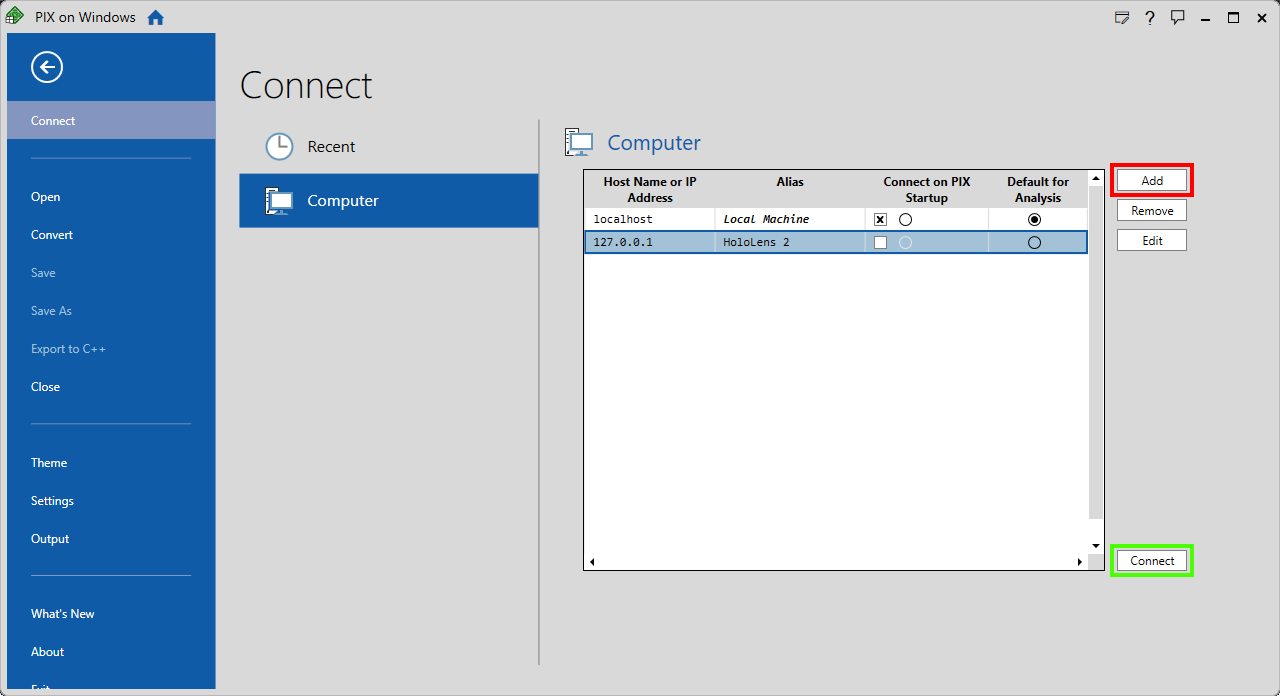
- From the Computer tab, select Add, and enter the following credentials:
- Alias: Up to user’s discretion
- Host Name or IP Address: 127.0.0.1
- Select Connect in the lower right of the Computer tab:
[!NOTE] The first connection is always slower because binaries are being copied.
-
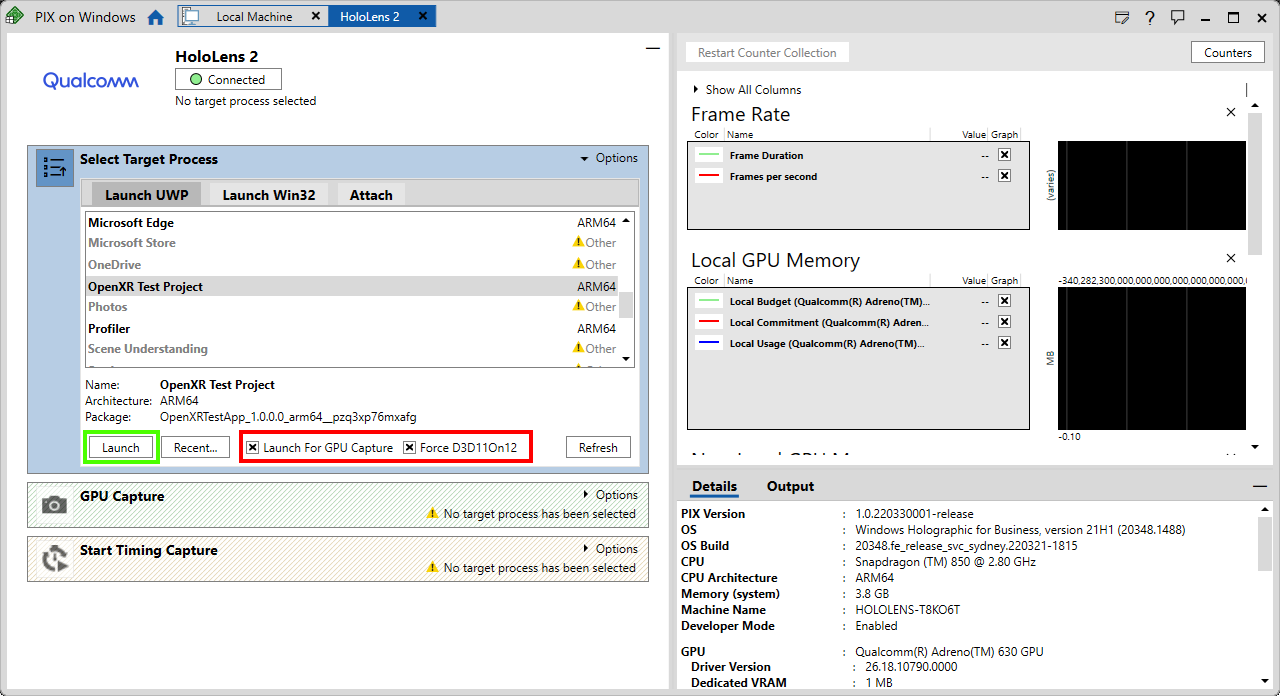
When PIX has connected to the HoloLens 2, find your app in the Select Target Process section in the Launch UWP tab, and then make sure Launch for GPU Capture is active.
-
If your application is running on DX11, make sure that Force D3D11On12 is selected.
-
Click Launch:
GPU captured
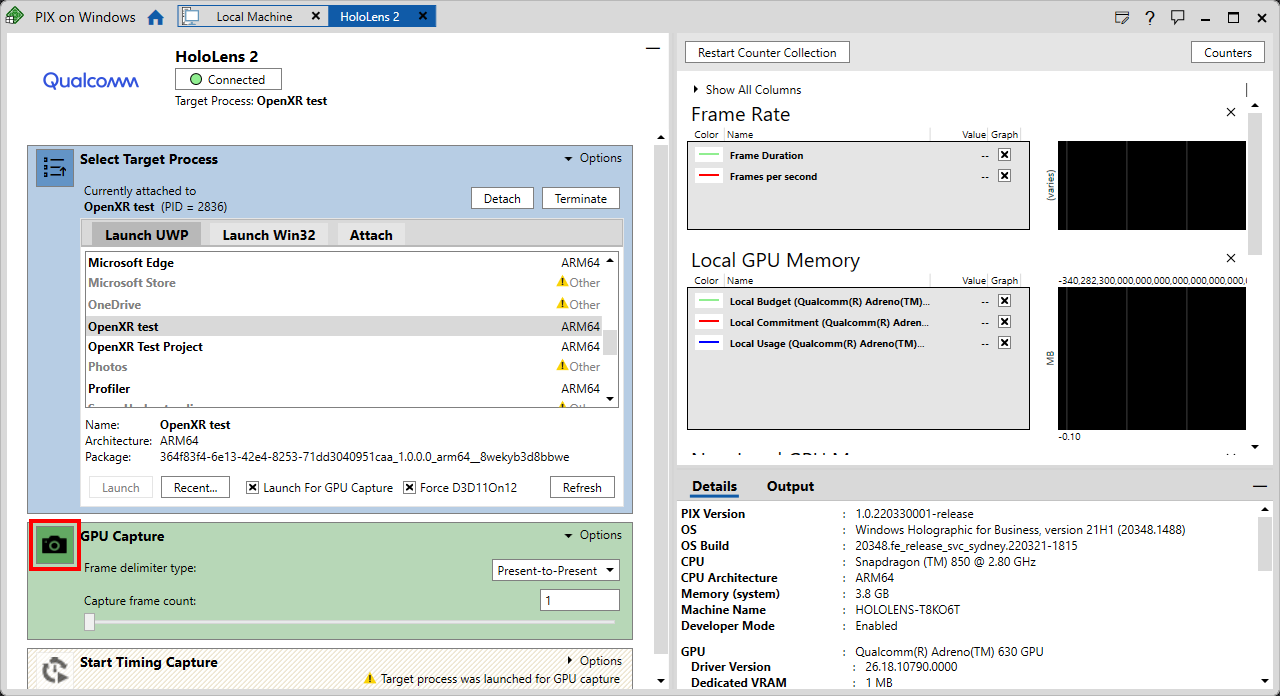
- Start the GPU capture by clicking Photo in the GPU Capture section:
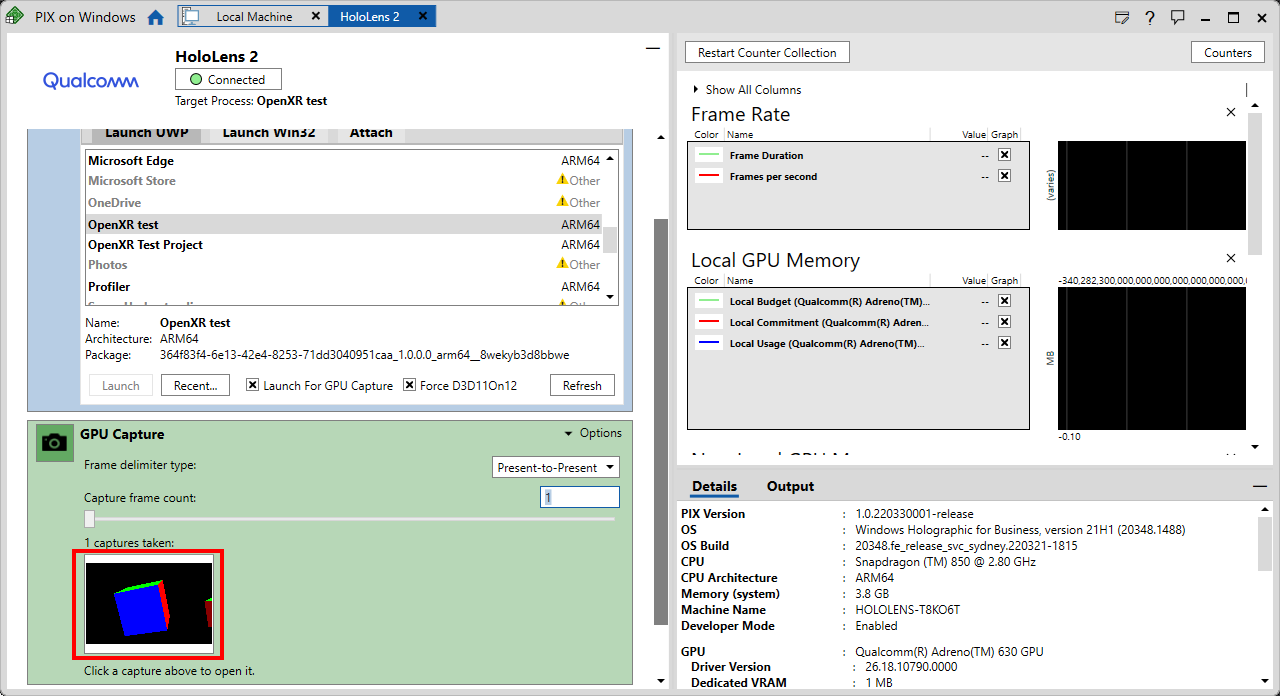
- Open the capture for analysis by clicking on the generated screenshot in the GPU Capture panel:
- Press Start to begin the analysis:
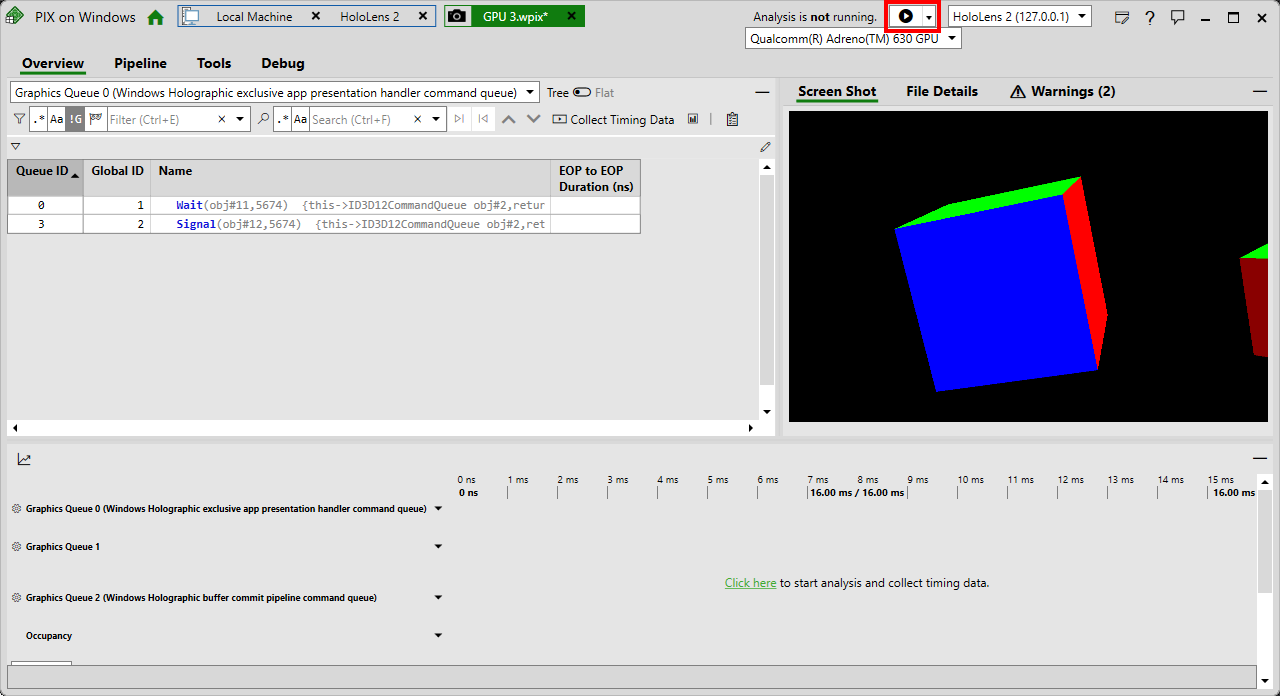
[!IMPORTANT] If you collect timing data after taking a GPU capture, you’ll be required to reboot the headset. This is a one-time restart of the device and is required for timing data collection.
PIX is now ready for use! For an introduction on how to use PIX, please refer to PIX GPU captures.